
gatsby-ecommerce-theme


This beautiful theme from the Matter Design Team gives you the styling and scaffolding for your next e-commerce site. You can customize to your heart's content and add the tooling for cart, transactions, product, and more. This theme uses:
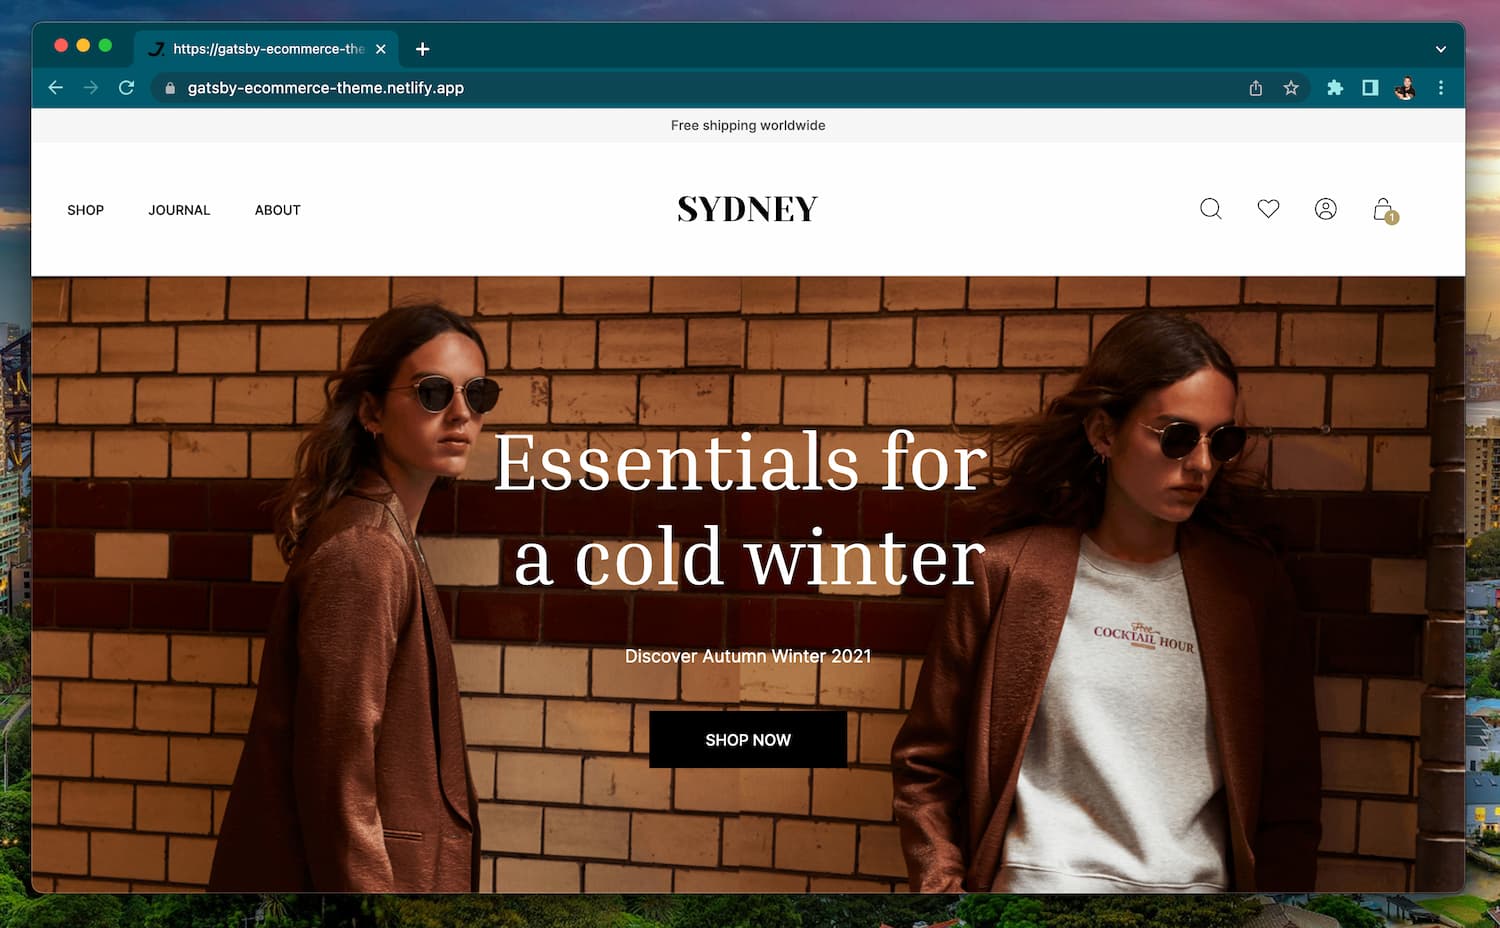
Take a look at the screenshot below or preview the live site here: https://gatsby-ecommerce-theme.netlify.app/!
🧐 Please be aware that some aspects of this theme are not fully functional and will need to be integrated with the recommended tooling mentioned at the end of the README.
Click the button below and it will help you create a new repo, create a new Netlify project, and deploy this Theme!
-
Clone this repo with one of these options:
- Click the 'Use this template' button at the top of the page
- Via the command line:
git clone https://github.com/netlify-templates/gatsby-ecommerce-theme/
- Or you can clone the theme straight from the Netlify CLI, using the
netlify sites:create-templatecommand in your terminal (learn more about this command here) to do the entire flow for you.
From there, you can install the project's dependencies by running:
npm install or yarn installFinally, you can run your project locally with:
cd gatsby-sydney-ecommerce-theme/
npm start or yarn start
or, run it using the Netlify CLI with:
netlify run devOpen your browser and visit http://localhost:5000, your project should now be running!
After installing and customizing your new e-commerce theme it's now time to deploy!
-
You can Deploy using the Netlify CLI:
netlify init # initialize a new Netlify project & deploy
It will use the information from the included Netlify configuration file, netlify.toml, to set up the build command as gatsby build to create a static project and locate the build project in the public directory.
The init process will also set up continuous deployment for your project so that a new build will be triggered & deployed when you push code to the repo (you can change this from your project dashboard: Site Settings/Build & deploy/Continuous Deployment).
You can also use netlify deploy (--prod) to manually deploy and netlify open to open your project dashboard.
💡 we only have so many keystrokes to give, use
ntlshorthand fornetlifyor make an alias of your own to save hours...of accumulated milliseconds
- You can deploy within the Netlify site by connecting to git, this video will walk you through that process.
- Or, you can use the Deploy to Netlify button which will walk you through the process of spinning up a repo, creating a new project in Netlify, AND deploying it :)
Here is a bit of an overview of the directory structure of the project:
| Directory | Description |
|---|---|
src/components/ |
Stores reusable elements across the site. (e.g. BlogPreview element) |
src/pages/ |
Stores routes for a user to go to based on each .js file and nested folder (e.g. src/pages/about.js creates a route /about in the web app) |
src/helpers |
Stores mock data for the blog or product list and general utility functions. |
On the homepage of the website and a few other places, there is a full-width image component. We refer to this as the <Hero/> component. Here is a bit of an overview of what its API looks like:
<Hero
  maxWidth='500px' // how big the image's maxumim should be
  image={'/banner1.png'} // the source location for the image
  title={'Essentials for a cold winter'} // the main text displayed
  subtitle={'Discover Autumn Winter 2021'} // text found below the main text
  ctaText={'shop now'} // the presented text for a user to click on
  ctaAction={goToShop} // the location the call-to-action text directs users
/>
You can see it in action under src/pages/index.js or see the component in src/components/Hero/Hero.js.
The project contains a file named src/config.json. Inside of this file describes the content of the header links (headerLinks) as well as the footer links (footerLinks). For the header, each element in the array has a base structure of:
{
  "menuLabel": "The label that is given to a user",
  "menuLink": "The URL that this should take a user to"
}
If you want the menu item to have a dropdown, you can also add a category key with the value being an array of the categories and their containing elements, here's what the base could look like:
{
  "menuLabel": "The label that is given to a user",
  "menuLink": "The URL that this should take a user to",
  "category": [
    {
      "categoryLabel": "Label you want the category to have",
      "submenu": [
        {
          "menuLabel": "A label underneath the category",
          "menuLink": "The associated link to this label"
        }
      ]
    }
  ]
}
The footer works in a similar way. It assumes each element in the array has a heading and an array of associated links to direct folks to:
"footerLinks": [
    {
      "subTitle": "Label of the column in the footer",
      "links": [
        {
          "text": "Text to display to the user",
          "link": "URL of where to take the user to when clicked"
        },
      ]
    }
]We’ve included some tooling that helps us maintain these templates. This template currently uses:
- Renovate - to regularly update our dependencies
- Cypress - to run tests against how the template runs in the browser
- Cypress Netlify Build Plugin - to run our tests during our build process
If your team is not interested in this tooling, you can remove them with ease!
In order to keep our project up-to-date with dependencies we use a tool called Renovate. If you’re not interested in this tooling, delete the renovate.json file and commit that onto your main branch.
For our testing, we use Cypress for end-to-end testing. This makes sure that we can validate that our templates are rendering and displaying as we’d expect. By default, we have Cypress not generate deploy links if our tests don’t pass. If you’d like to keep Cypress and still generate the deploy links, go into your netlify.toml and delete the plugin configuration lines:
[[plugins]]
  package = "netlify-plugin-cypress"
-  [plugins.inputs.postBuild]
-    enable = true
-
-  [plugins.inputs]
-    enable = false
If you’d like to remove the netlify-plugin-cypress build plugin entirely, you’d need to delete the entire block above instead. And then make sure sure to remove the package from the dependencies using:
npm uninstall -D netlify-plugin-cypressAnd lastly if you’d like to remove Cypress entirely, delete the entire cypress folder and the cypress.config.ts file. Then remove the dependency using:
npm uninstall cypressThis project is intended to be extended by you! We wanted to make possible to replace parts of it with your own tools and data sources. If you're interested on a direction, you can refer to Matter's how to use section in this project or you may want to consider using Matter's toolset with their JAMM framework which includes some projects like:
- BigCommerce for a headless e-commerce solution
- Builder as a CMS for the blog articles or other content creation
- Klaviyo for any email or SMS marketing automation
Cite As
Nilesh (2024). gatsby-ecommerce-theme (https://github.com/Nileshk27/gatsby-ecommerce-theme), GitHub. Retrieved .
MATLAB Release Compatibility
Platform Compatibility
Windows macOS LinuxTags
Community Treasure Hunt
Find the treasures in MATLAB Central and discover how the community can help you!
Start Hunting!Discover Live Editor
Create scripts with code, output, and formatted text in a single executable document.
Versions that use the GitHub default branch cannot be downloaded
| Version | Published | Release Notes | |
|---|---|---|---|
| 1.0.0 |
|
You can also select a web site from the following list
Americas
- América Latina (Español)
- Canada (English)
- United States (English)
Europe
- Belgium (English)
- Denmark (English)
- Deutschland (Deutsch)
- España (Español)
- Finland (English)
- France (Français)
- Ireland (English)
- Italia (Italiano)
- Luxembourg (English)
- Netherlands (English)
- Norway (English)
- Österreich (Deutsch)
- Portugal (English)
- Sweden (English)
- Switzerland
- United Kingdom (English)
Asia Pacific
- Australia (English)
- India (English)
- New Zealand (English)
- 中国
- 日本Japanese (日本語)
- 한국Korean (한국어)