Get Started with Image Tool
The Image Tool presents an integrated environment for displaying images and performing common image processing tasks. The workflow for using Image Tool typically involves a combination of these steps:
Note
The Image Viewer app is recommended over Image Tool in most situations. Image Viewer offers more functionality and is easier to use than the Image Tool. Use the Image Tool only when you need to customize the figure containing the tool. For more information, see Get Started with Image Viewer App.
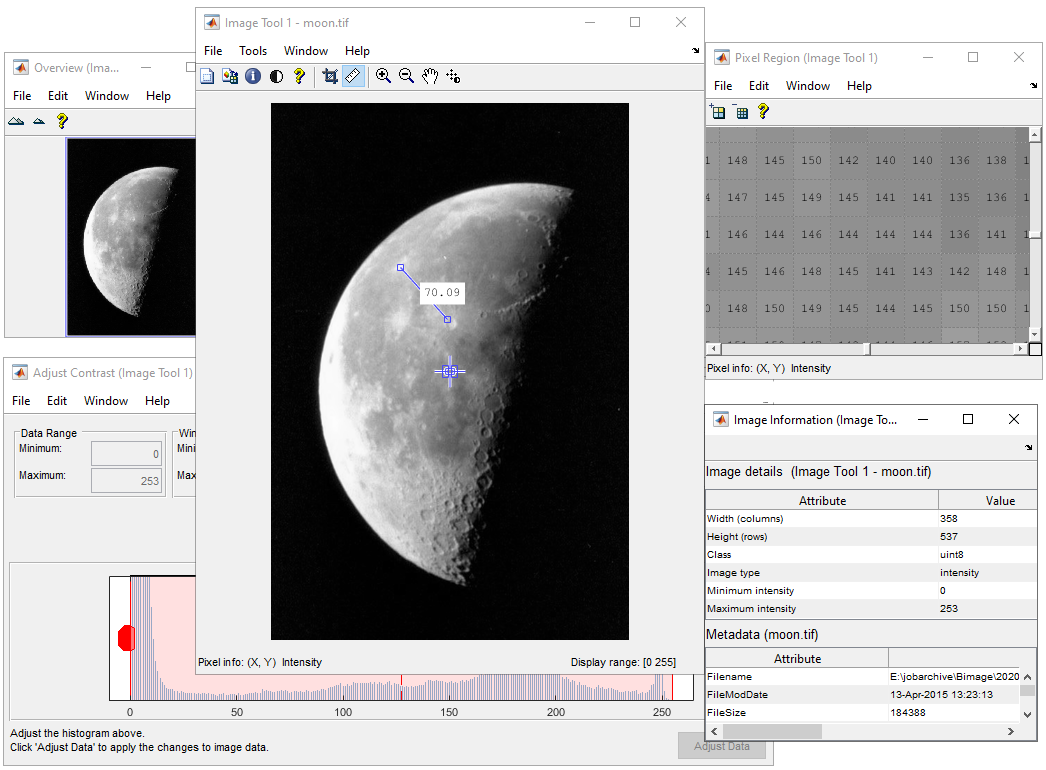
The figure shows an image displayed in an Image Tool with many of the related tools open and active.
Note
You can also access individual tools outside the Image Tool. To do so, display an image
in a figure window using a function such as imshow, then create one or more tools using toolbox functions. For example,
you can build an image processing app with custom layout and behavior using a combination of
individual tools. For more information, see Interactive Tool Workflow
Open Image Tool and Display Image
There are three ways to open the Image Tool. In each case, you can select an image from
a variable in the workspace or specify the name of the image file. Image Tool can open any
file that can be read by imread.
You can open the Image Tool from the command line by using the
imtoolfunction. You can control various aspects of the initial image display, such as the initial magnification, colormap, or display range. For example, this code opens Image Tool and loads the image with filenamecameraman.tif.imtool("cameraman.tif")You can open the Image Tool from the command line by using the
images.compatibility.imtool.r2023b.imtoolfunction. Use this option to return the figure containing the Image Tool. For example, this code opens Image Tool, loads the image with filenamecameraman.tif, and returns the figure containing the tool.hTool = images.compatibility.imtool.r2023b.imtool("cameraman.tif")You can start a new Image Tool from within an existing Image Tool by using the New option from the File menu.
Navigate Image in Image Tool
After you open Image Tool, the image appears in the figure window. Image Tool provides navigation aids and tools that can help you explore images in detail.
| Action | Tools and Navigation Aids | Depiction of Tool |
|---|---|---|
| See image overview | The Overview tool displays the entire image with a superimposed detail rectangle that indicates which portion of the image is currently visible in Image Tool. You can pan and zoom the image visible in the Image Tool by moving and resizing the detail rectangle in the Overview tool. To get the current position and size of the detail
rectangle, right-click anywhere inside the rectangle and select Copy
Position from the context menu. The tool copies the position as a
four-element vector of the form To print the view of the image displayed in the Overview tool, select the Print to Figure option from the Overview tool File menu. See Print Images for more information. |  |
| Magnify image | To enlarge or shrink an image by specifying a scale factor, use the Magnification option on the Tools menu. To enlarge or shrink an image by clicking the image, use the Zoom tool. The tool centers the new view of the image on the spot where you clicked. Note You can also zoom by using the Ctrl+Plus or Ctrl+Minus keys. These are the Plus(+) and Minus(-) keys on the numeric keypad of your keyboard. When Image Tool scales an image, it uses interpolation to determine the
values for screen pixels that do not directly correspond to elements in the image
matrix. For more information about interpolation methods used for resizing images,
see | |
| Pan image | To pan an image that is too large to fit in the Image Tool, use scroll bars or the Pan tool. | |
| Choose image colormap | To enhance the visibility of features in grayscale and indexed images, you can change the image colormap using the Choose Colormap tool. You can select a MATLAB® colormap or a colormap variable from the workspace. You can also create a colormap by entering a MATLAB command. Image Tool does not provide a color bar. To add a color bar, open the image in another figure window. For more information, see Save and Export Results. | 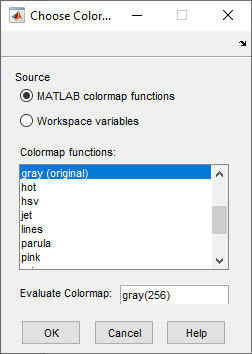 |
Get Information about Image Data
Image Tool provides tools that can help you get information about pixel values and other aspects of the image data.
| Tool | Description | Depiction of Tool |
|---|---|---|
| Pixel Information tool | Get the (x, y) coordinates and the value of a single pixel under the pointer. The format of the pixel information depends on the image type. To save the pixel location and value information, right-click a pixel in the image and choose the Copy pixel info option. The Image Tool copies the x- and y-coordinates and the pixel value to the clipboard. You can paste this pixel information into the workspace or another application. | |
| Display Range tool | Determine the display range of grayscale image data. The tool is not enabled for RGB, indexed, or binary images. The display range is of
the form | 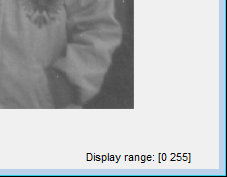 |
| Pixel Region tool | Get information about a group of pixels. When the magnified pixels are sufficiently large, the Pixel Region tool overlays the pixel value over each pixel. For RGB images, this information includes three numeric values, one for each color channel. For indexed images, this information includes the index value and the associated RGB value. You can toggle the display of numeric pixel values by going to the Pixel Region tool Edit menu and changing the Superimpose Pixel Values option. The Pixel Region tool includes its own Pixel Information tool that enables you to get the (x, y) coordinates and pixel value of the pixel under the pointer in the Pixel Region tool. To save the
position of the pixel region rectangle with respect to the image, select the
Copy Position option from the Pixel Region tool
Edit menu. The tool copies the position as a four-element
vector of the form To print the view of the image displayed in the Pixel Region tool, select the Print to Figure option from the Pixel Region tool File menu. See Print Images for more information. | |
| Distance tool | Measure the Euclidean distance between two pixels. The Distance tool displays a line between the pixels and a label with the Euclidean distance between endpoints of the line. The tool specifies the distance in data units determined by the To customize aspects of the Distance tool appearance and behavior, use the Distance tool context menu. For example, you can toggle the distance label on and off, change the color of the distance line, and constrain the tool to the vertical or horizontal direction. To create variables in the workspace for the endpoint locations and distance information, right-click the Distance tool and choose the Export to Workspace option from the context menu. | 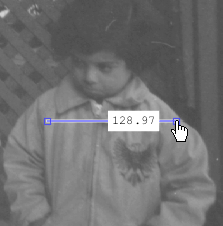 |
| Image Information tool | Get information about image and image file metadata. The Image Information tool always provides basic information about the width, height, data type, and image type. For grayscale and indexed images, this information includes the minimum and maximum intensity values. If you select an
image to open in Image Tool by specifying a filename, then the Image Information
tool also displays image metadata. This metadata is the same information returned
by the | 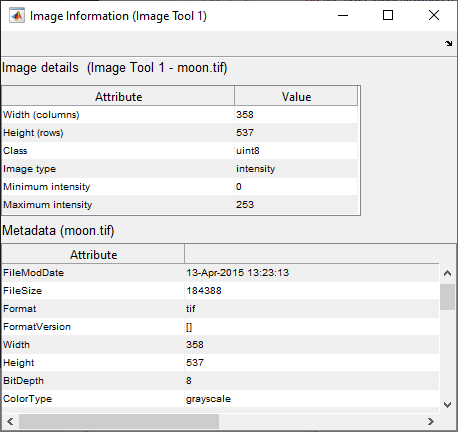 |
Modify Image Data
Image Tool provides tools that can help you adjust the image contrast and crop an image.
By default, when you close Image Tool, the tool does not save the modified image data. However, you can export the modified image to a file or save the modified data in a workspace variable. For more information, see Save and Export Results.
| Tool | Description | Depiction of Tool |
|---|---|---|
| Adjust Contrast tool | Adjust the contrast of an image by setting a window over a histogram of
pixel values. Open the Adjust Contrast tool by clicking Adjust
Contrast
You can adjust the display window by clicking and dragging on the edges of the red window, or by entering values in the boxes for the minimum, maximum, center, and width of the window. Alternatively, let the Adjust Contrast tool scale the display range automatically. Select Match data range to make the display range equal to the data range of the image. Select Eliminate outliers to saturate an equal percentage of pixels at the top and bottom of the display range. By default, the tool eliminates 2%, so the top 1% and the bottom 1% of pixel values. |  |
| Window/Level tool | Adjust the contrast of an image by interacting with the image. To start the Window/Level tool, click the Window/Level
Move the pointer over the image.
The pointer changes to the Window/Level cursor | |
| Crop Image tool | Crop an image to a rectangular region of interest. Start the Crop Image
tool by clicking Crop Image
When you move the pointer over the image,
the pointer changes to cross hairs When you are finished defining the crop region, double-click the left mouse button to crop the image. | 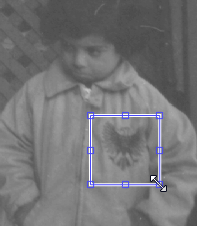 |
Save and Export Results
Image Tool enables you to export image data to the workspace, save the image data to
file, and open images in a new figure window. When saving and exporting image data, changes
to the display range are not preserved. If you would like to preserve your changes, then use
the imcontrast function.
| Destination | Procedure |
|---|---|
| Create workspace variable | There are three ways to create a workspace variable from the image data in Image Tool.
|
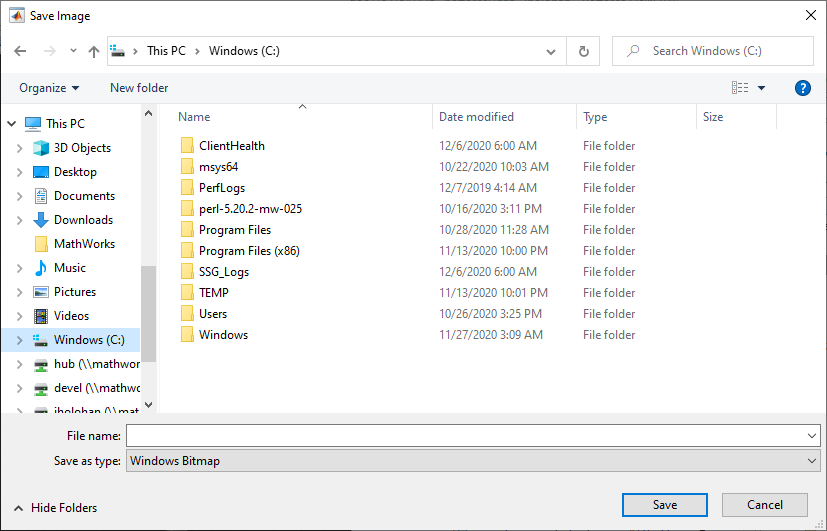
| Save to file | Use the Save Image tool by selecting the Save as option on the Image Tool File menu. This tool enables you to navigate your file system to determine where to save the file, specify the file name, and choose the file format.
|
| Open new figure window | Select the Print to Figure option from the File menu. You can use this figure window to see a color bar and print the image. For more information, see Add Color Bar to Displayed Grayscale Image and Print Images. |