Create Standalone Applications for Arduino Hardware
This example shows how to create a standalone application and install and run the generated application on target computers that do not have MATLAB® installed. This example uses the LCD add-on library, but you can use this workflow to create a standalone application for any user-defined function or MATLAB script that uses Arduino® functionality. For more information, see Create LCD Add-on.
This example helps you to:
Generate a standalone application by compiling a user-defined function that displays “Hello World!” on an LCD.
Run the application on a target computer that does not have MATLAB installed.
Generate Standalone Application
Create a standalone application.
Set up the hardware as described in Setup.
Add the
ExampleLCD/LCDAddonadd-on library to the path.For this example, build an application from a function called
LCDAddOnExample_deploy. The function displays "Hello World!" on an LCD. Save the function to a file.function LCDAddOnExample_deploy() a = arduino('COM5','Uno','Libraries','ExampleLCD/LCDAddon','ForceBuildOn',true); lcd = addon(a,'ExampleLCD/LCDAddon','RegisterSelectPin','D7','EnablePin','D6','DataPins',{'D5','D4','D3','D2'}); initializeLCD(lcd); printLCD(lcd,'Hello World!'); clearLCD(lcd); end
Use the Standalone Application Compiler (MATLAB Compiler) app to package the MATLAB programs into applications that can run outside of MATLAB. To open the Standalone Application Compiler app, type
standaloneApplicationCompilerat the MATLAB command line. Alternatively, on the Apps tab, expand the Apps gallery. In the Application Deployment section, click Standalone Application Compiler.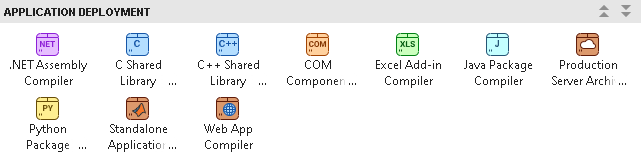
After you open the app, the Create Compiler Task dialog box prompts you to add a compiler task to a new or an existing MATLAB project. For this example, select Start a new project and create a compiler task and create a new project named
LCDAddOnProjectin your working folder.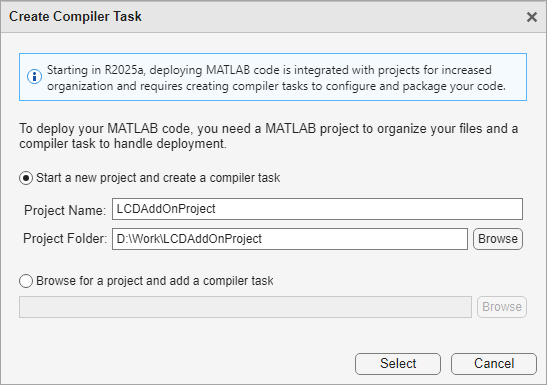
A new compiler task named
StandaloneDesktopApp1opens in the Editor.
In the Main File section of the compiler task, click Add Main File and select
LCDAddOnExample_deploy.m. In the Project panel, the file now has the labels Design and Main Function.
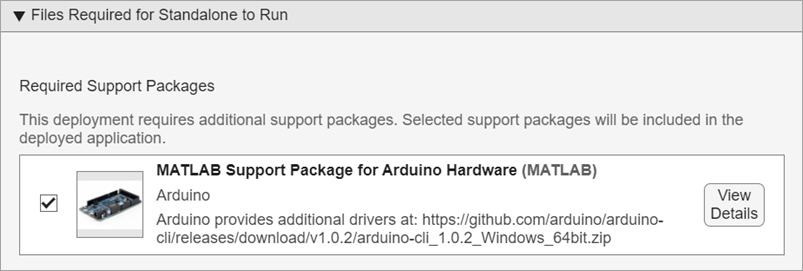
The Files Required for Standalone to Run section of the app displays the MATLAB Support Package for Arduino Hardware.
In the Files Required for Standalone to Run section, under Custom Requirements, add
ExampleLCD/LCDAddon.m, which is the LCD add-on library.
In the Application Info section, replace the string
My Desktop Applicationwith the name of your standalone application,LCDAddOnApplication. You can specify other details in this section, such as the author, company, and description.
In the Executable Details section, name the executable
LCDAddonApplication. Under Application Type, select Standalone Windows Application if you are using Windows®; otherwise, select Standalone Application. Under Input Type, select Treat inputs to the app as a numeric MATLAB double.
In the Installer Details section, name the generated installer
LCDAddonInstaller. You can also specify other installer options such as the runtime delivery method. These options correspond to the options available with thecompiler.package.installer(MATLAB Compiler SDK) function.
You can convert this code to a MATLAB script file by clicking the Export Build Script button. Running the generated build script is equivalent to clicking the Build and Package button.

To generate both the standalone application and an installer, click Build and Package. To create the application executable without an installer, select Build and Package > Build.
The compiler generates files in the
<compiler_task_name>/output folder in your project folder.
The build subfolder contains the standalone application
executable, and the package subfolder contains an installer for
your standalone application along with MATLAB Runtime. To choose a different output
location for the generated files, update the paths in the Output
Locations section.
For more details on the application compiler app, see Create Standalone Application from MATLAB (MATLAB Compiler) and Manage Support Packages (MATLAB Compiler).
Install and Run Standalone Application on Target Computer
To deploy your application outside of MATLAB, your version of MATLAB Runtime must be the same version you must have MATLAB Runtime installed at the same version as the MATLAB version used to build the application. Ensure that your end users can run the application by including MATLAB Runtime in the installer or by supplying users with information on how to download it. For information on installing and using MATLAB Runtime, see About MATLAB Runtime (MATLAB Compiler SDK).
To run the generated LCDAddonApplication application on the
target computer, the user needs to download the Arduino CLI, run the configuration
commands, and install the required cores and libraries.
Download the Arduino CLI from GitHub based on your operating system. The Arduino CLI enables you to configure your Arduino board at the command line.
Operating System Arduino CLI 1.0.2 Windows arduino-cli_1.0.2_Windows_64bit.zipMac with Apple Silicon Processor arduino-cli_1.0.2_macOS_ARM64.tar.gzLinux® arduino-cli_1.0.2_Linux_64bit.tar.gzExtract the files to a location such as:
For Windows: C:\Arduino
For Mac: ~/Documents/Arduino
For Linux: /home/<userName>/Documents/Arduino
Open the command terminal from the folder where you extracted the files and execute these configuration commands.
Operating System Configuration Commands Windows arduino-cli config init --overwrite --dest-file arduino-cli.yaml
arduino-cli config set directories.data data --config-file arduino-cli.yaml
arduino-cli config set directories.user user --config-file arduino-cli.yaml
arduino-cli config set directories.downloads downloads --config-file arduino-cli.yaml
Mac with Apple Silicon Processor and Linux ./arduino-cli config init --overwrite --dest-file arduino-cli.yaml
./arduino-cli config set directories.data data --config-file arduino-cli.yaml
./arduino-cli config set directories.user user --config-file arduino-cli.yaml
./arduino-cli config set directories.downloads downloads --config-file arduino-cli.yaml
Install the following cores:
AVR 1.8.3, SAM 1.6.12, SAMD 1.8.9, Arduino Mbed Nano 4.0.4, Arduino Renesas 1.2.0, and RP2040 4.4.4, using the following command, replacing
myCore@myCoreVersionwith the core and core version number:Operating System Configuration Commands Windows arduino-cli core install myCore@myCoreVersion --config-file arduino-cli.yaml
Mac with Apple Silicon Processor and Linux ./arduino-cli core install myCore@myCoreVersion --config-file arduino-cli.yaml
For example, if you are using AVR 1.8.3, enter:
For Windows:
arduino-cli core install arduino:avr@1.8.3 --config-file arduino-cli.yaml
For: Mac with Apple Silicon Processor and Linux:
./arduino-cli core install arduino:avr@1.8.3 --config-file arduino-cli.yaml
ESP32 2.0.17 (only if you are using an ESP32 board):
Operating System Commands to Install the Core Windows arduino-cli config set board_manager.additional_urls https://raw.githubusercontent.com/espressif/arduino-esp32/gh-pages/package_esp32_index.json --config-file arduino-cli.yaml
arduino-cli core search esp32 --config-file arduino-cli.yaml
arduino-cli core install esp32:esp32@2.0.17 --config-file arduino-cli.yaml
Mac with Apple Silicon Processor and Linux ./arduino-cli config set board_manager.additional_urls https://raw.githubusercontent.com/espressif/arduino-esp32/gh-pages/package_esp32_index.json --config-file arduino-cli.yaml
./arduino-cli core search esp32 --config-file arduino-cli.yaml
./arduino-cli core install esp32:esp32@2.0.17 --config-file arduino-cli.yaml
Install the libraries, which are Servo 1.2.2, ACAN2515 2.0.2, Adafruit Motor Shield V2 Library 1.0.4, ArduinoBLE 1.3.6, ArduinoMotorCarrier 2.0.0, MKRMotorCarrier 1.0.1, ServoESP32 1.0.3, WiFi101 0.16.0, and WiFiNINA 1.8.8, using the following commands, replacing
myLibrary@myLibraryVersionwith the library name and version number.Operating System Command to Install the Libraries Windows arduino-cli lib install myLibrary@myLibraryVersion --config-file arduino-cli.yaml
Mac with Apple Silicon Processor and Linux ./arduino-cli lib install myLibrary@myLibraryVersion --config-file arduino-cli.yaml
For example, if you are using Servo 1.1.8, enter:
For Windows:
arduino-cli lib install Servo@1.1.8 --config-file arduino-cli.yaml
For: Mac with Apple Silicon Processor and Linux:
./arduino-cli lib install Servo@1.1.8 --config-file arduino-cli.yaml
Set up the hardware as described in Setup.
Execute the application
LCDAddonApplication.In the Configure Arduino window that opens, select the serial port to which the board is connected. To find the serial port on your operating system, see Find Arduino Port on Windows, Mac, and Linux.

If you do not want to see this window during deployment, use this command in your script. Replace
<PORT>with the hardware port that your board is connected to,<BOARD_NAME>with the name of your board, and<ARDUINO_CLI_PATH>with the Arduino CLI path.Thea = arduino("<PORT>","<BOARD_NAME>",'ArduinoCLIPath',"<ARDUINO_CLI_PATH>");ArduinoCLIPathname-value argument is supported only in deployed applications.Select the board.
Enter the path to the folder where you extracted the Arduino CLI files and click Submit.
The LCD now displays "Hello World!".
See Also
Create LCD Add-on | Standalone Application Compiler (MATLAB Compiler) | Create Standalone Application from MATLAB (MATLAB Compiler) | Manage Support Packages (MATLAB Compiler) | About MATLAB Runtime (MATLAB Compiler SDK)