Build and Run Tests in Polyspace Platform User Interface
You can author C/C++ tests graphically in the Polyspace Platform user interface. These graphically authored tests are converted into C or C++ code that uses the Polyspace® Test™ xUnit-based API for testing. You can build the test code together with the sources into a test executable and then run the test executable.
Validate Tests
Before building tests, you can run a quick validation to check for missing test data and incorrect code under test. Test validation helps you identify places where the code under test has changed since the tests were last written. In particular, if you rename, remove or change the interface of a function, you can easily locate which tests need to be updated.
To run validation on tabular tests:
Right-click the Tests node of a project and select Validate Tests. You can also right-click an individual graphical test and select Validate (or open the test and select Validate on the Test Case tab of the Polyspace Platform toolstrip).
Tests with validation issues are shown with a
 mark next to them.
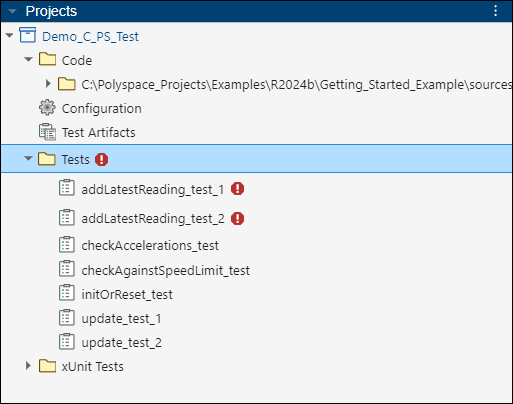
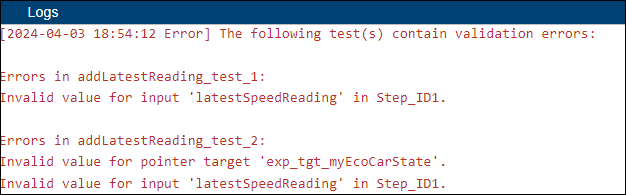
Check the Logs pane for further details of the errors.
Note that the validation runs automatically when you try to build the tests in a project.
Build Tests
In the Polyspace Platform user interface, after you add files to a project, you can build the project. To build a project:
Specify a compiler, target, and other relevant build options in your project. Double-click the Configuration node of your project and specify the Target & Compiler options on the Build tab of the Configuration pane. See also Specify C/C++ Compilers for Testing in Polyspace Platform User Interface.
Click the Build Project button on the Polyspace Platform toolstrip.
To build only a single test, on the Projects pane, right-click the test under the Tests node and select Build Tests. Alternatively, double-click and open the test. On the Test Case tab of the toolstrip, select Build Test.
Note that a project build takes into account previous build information and rebuilds only those sources that changed since the previous build. Some changes in project configuration such as changes in processor information do not trigger a build of the sources in the project. In these situations, you can force a full build of the sources by selecting Rebuild Project instead of Build Project on the toolstrip. Alternatively, you can select Clean Project to remove existing build information before selecting Build Project.
Follow the progress of build in the Building Project window.
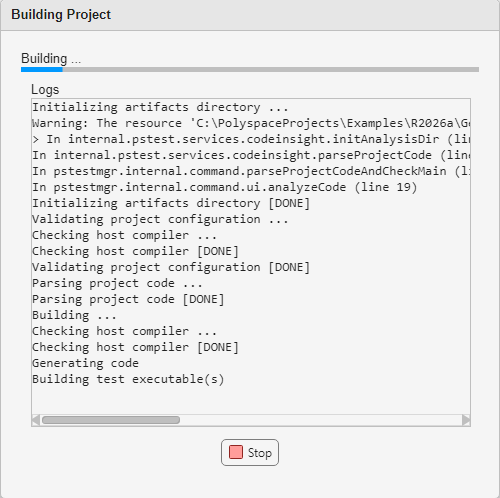
Once the build completes, this window closes and the Logs pane shows collapsed logs, along with a link to View logs and the message:
If the build fails, you can also see errors on this pane.Building Project [DONE]To see the full build log, select View logs next to the collapsed build log to open the log in a new window, or right-click and select Open Outside Polyspace to open the
.logfile in an external editor.To clear the content on the Logs pane, click the
 icon on the upper right
of the pane and select Clear
Logs.
icon on the upper right
of the pane and select Clear
Logs.
For more information on:
How to troubleshoot build errors, see Fix Project Build Errors in Polyspace Platform User Interface.
Specific types of errors during build and possible workarounds, see Troubleshooting in Polyspace Test.
The build process creates an executable that can be used to run one or all tests. To create the executable, Polyspace Test:
Extracts copies of the added source code from the project. If you enabled code profiling, Polyspace Test instruments the copies with appropriate macros.
Generates C/C++ code from the tests you added. To view the generated code, click the Test Code button on the Test Case tab of the Polyspace Platform toolstrip. You cannot modify the generated code.
Constructs a build command using the compiler and other options you specified in the project configuration.
Executes the build command on your source and test files.
Run Tests
After completing a project build, you can run all tests in the project, a suite of tests, or a single test. If you attempt to run tests without having built the project first, the build step is automatically initiated.
To run all tests in a project, click the Run Tests button on the Polyspace Platform toolstrip. Alternatively, you can right-click the Tests node of a project and select Run Tests.
To run a single test, right-click the test under the Tests node of a project and select Run.
To run a suite of tests, right-click the suite name under the Tests node of a project and select Run Tests.
After the tests execute, you can see test pass or fail information on the Results pane. To open the log information for the test run, click View logs in the Logs pane, or right-click View logs to open the log file outside of the Polyspace Platform user interface. See also Review C/C++ Test Execution Results.