Navigate to Requirements in Microsoft Office Documents from Simulink
With Requirements Toolbox™, you can capture, track, and manage requirements in Microsoft® Word and Excel®. When you create a link from a model object to a requirement RMI stores the link data in the model file. Using this link, you can navigate from the model object to its associated requirement. You can only create and navigate direct links to requirements in Microsoft Word and Excel on Windows® platforms.
Enable Linking from Microsoft Office Documents to Simulink Objects
When you create a link to a requirement in a Microsoft Office document, you can insert a navigation object in the document. This navigation object serves as a link from the requirement to its associated model object. By default, the RMI does not insert navigation objects into requirements documents. You can change the settings to automatically insert the navigation objects when you create the link.
To enable linking from a Word or Excel document to the example model:
Open the example:
openExample("slrequirements/" + ...
    "ManageReqsForFaultTolerantFuelCtrlSysMicrosoftOffice07Example")
Open the model:
open_system("slvnvdemo_fuelsys_officereq")Note
You can modify requirements settings in the Requirements Settings dialog box. These settings are global and not specific to open models. Changes you make apply not only to open models, but also persist for models you subsequently open. For more information about these settings, see Requirements Settings.
In the Apps tab, click Requirements Manager. In the Requirements tab, ensure Layout > Requirements Browser is selected. In the Requirements Browser, in the View drop-down select
Links. In the Requirements tab, select Link Settings > Linking Options.The Requirements Settings dialog box opens.
On the Selection Linking tab of the Requirements Settings dialog box:
Enable Modify destination for bidirectional linking.
When you select this option, every time you create a selection-based link from a Simulink® object to a requirement, the RMI inserts a navigation object at the designated location in the requirements document.
To specify one or more keywords to apply to the links that you create, in the Apply this keyword to new links field, enter the keyword names.
For more information about keywords, see User Keywords and Requirements Filtering.
Click Close to close the Requirements Settings dialog box. Keep the
slvnvdemo_fuelsys_officereqmodel open.
Insert Navigation Objects in Microsoft Office Documents
Use selection-based linking to create a link from the
slvnvdemo_fuelsys_officereq model to a requirements document. If
you have configured the RMI as described in Enable Linking from Microsoft Office Documents to Simulink Objects, the RMI
can insert a navigation object into the requirements document.
Open the Word document.
openExample("slrequirements/" + ...
    "ManageReqsForFaultTolerantFuelCtrl" + ...
    "SysMicrosoftOffice07Example", ...
    supportingFile= ...
    "slvnvdemo_FuelSys_RequirementsSpecification.docx")
Select the Throttle Sensor header.
Open the
slvnvdemo_fuelsys_officereqmodel.openExample("slvnvdemo_fuelsys_officereq.slx")In the
slvnvdemo_fuelsys_officereqmodel, open theengine gas dynamicssubsystem.Add Requirements Manager app options to the context menu. Right-click the model canvas, point to Select Apps, and click the Requirements Manager button
 .
.Right-click the
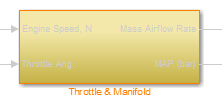
Throttle & Manifoldsubsystem and, in the Link to Selected Requirement row, pause on the arrow, then click Link to Selection in MS Word.Requirements Toolbox inserts a URL-based link into the requirements document.
Link to Multiple Model Objects
If you have several model objects that correspond to one requirement, you can link them to one requirement with a single navigation object. This eliminates the need to insert multiple navigation objects for a single requirement. The model objects must be available in the same file.
The workflow for linking multiple model objects to one Microsoft Word entry is as follows:
Make sure that the RMI is configured to insert navigation objects into requirements documents, as described in Enable Linking from Microsoft Office Documents to Simulink Objects.
Select the Word requirement to link to.
Select the model objects that need to link to that requirement.
Right-click one of the model objects and, in the Link to Selected Requirement row, pause on the arrow, then click Link to Selection in MS Word.
A single navigation object is inserted at the selected requirement.
Navigate to the model by following the navigation object link in Word.
Customize Microsoft Office Navigation Objects
If the RMI is configured to modify destination for bidirectional linking, the RMI
inserts a navigation object into your requirements document. This object looks like the
icon for the Simulink software: ![]()
Note
In Microsoft Office requirements documents, following a navigation object link highlights the Simulink object that contains a bidirectional link to the associated requirement.
To use an icon of your own choosing for the navigation object:
In the Requirements tab, select Link Settings > Linking Options.
Select the Selection Linking tab.
Select Modify destination for bidirectional linking.
Selecting this option enables the Use custom bitmap for navigation controls in documents option.
Select Use custom bitmap for navigation controls in documents.
Click Browse to locate the file you want to use for the navigation objects.
For best results, use an icon file (
.ico) or a small (16×16 or 32×32) bitmap image (.bmp) file for the navigation object. Other types of image files might give unpredictable results.Select the desired file to use for navigation objects and click Open.
Close the Requirements Settings dialog box.
The next time you insert a navigation object into a requirements document, the RMI uses the file you selected.
Navigate Between Microsoft Office Requirement and Model
In Insert Navigation Objects in Microsoft Office Documents, you
created a link between a Microsoft Office requirement and the Throttle & Manifold subsystem in the
slvnvdemo_fuelsys_officereq example model. Navigate these links
in both directions:
Open the
slvnvdemo_fuelsys_officereqmodel.openExample("slvnvdemo_fuelsys_officereq.slx")Add Requirements Manager app options to the context menu. Right-click the model canvas, point to Select Apps, and click the Requirements Manager button
.In the
slvnvdemo_fuelsys_officereqmodel, right-click theThrottle & Manifoldsubsystem and, in the Requirements Manager app section, clickImplement: “Throttle Sensor”.The requirements document opens, and the header in the requirements document is highlighted.
In the requirements document, next to Throttle Sensor, follow the navigation object link.
The engine gas dynamics subsystem opens, with the Throttle & Manifold subsystem highlighted.
Navigation from Microsoft Office requirements documents is not automatically enabled upon MATLAB® startup. Navigation is enabled when you create a new requirements link or when you have enabled bidirectional linking as described in Insert Navigation Objects in Microsoft Office Documents.
Note
You cannot navigate to requirements from Microsoft Word 2013 onwards when the document is open in read-only mode. Alternately, consider disabling the “Open e-mail attachments and other uneditable files in reading view” option in the Microsoft Word options or using editable documents.
When attempting navigation from requirements links with the
![]() icon, if you get a “Server Not Found” or similar
message, enter the command
icon, if you get a “Server Not Found” or similar
message, enter the command rmi('httpLink') to activate the internal
MATLAB HTTP server.