Model and Analyze WLAN Network Using Wireless Network Modeler App
Model a wireless local area network (WLAN), consisting of an access point (AP) and two stations (STAs), using the Wireless Network Modeler app.
Create WLAN Network
Follow these steps to create a WLAN network using the Wireless Network Modeler app.
Open the Wireless Network Modeler app.
On the app toolstrip, click New Session and select WLAN Network.
In the Nodes Placement section, set Number of AP to
1and Number of STA per AP to2.Clear Enable full buffer application data traffic.
Click Create Network.
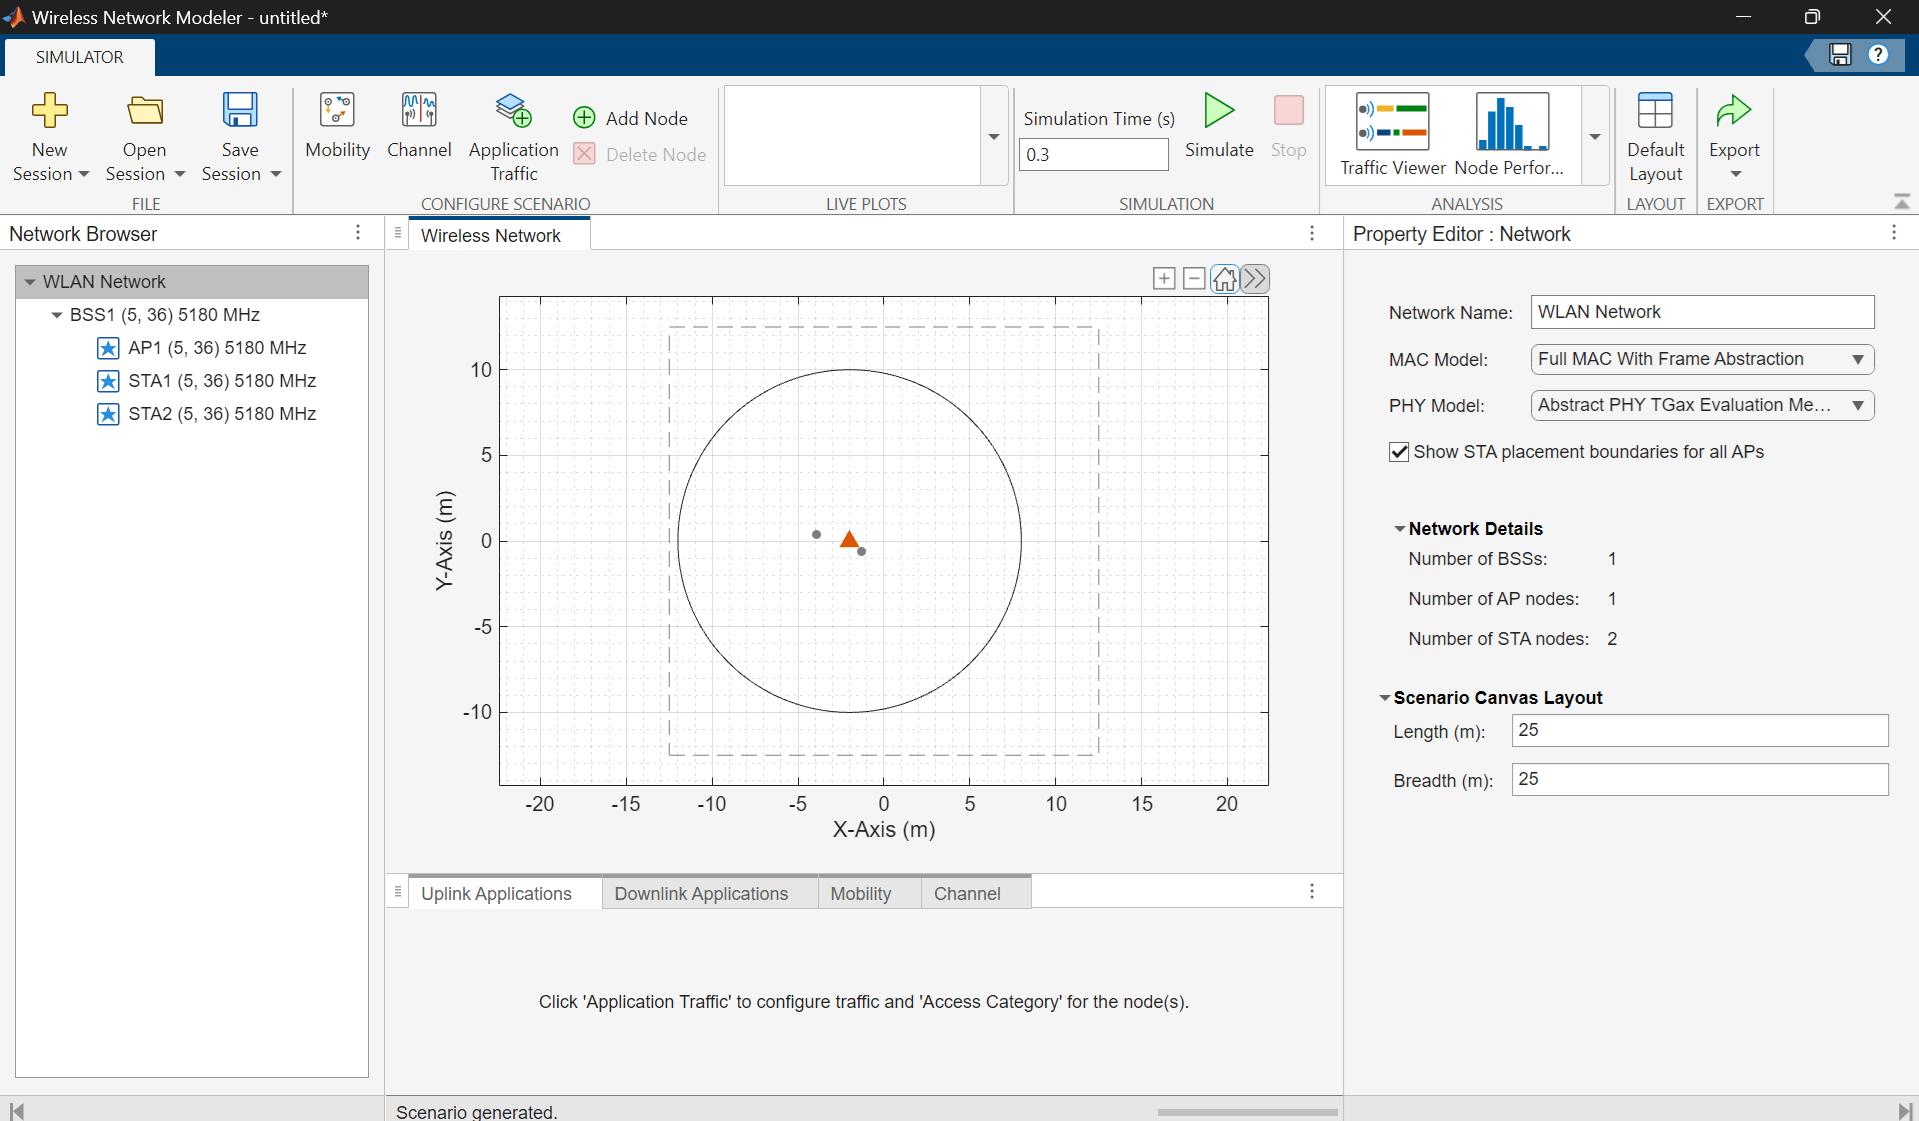
Configure WLAN Nodes
Configure the WLAN nodes by following these steps.
In the Property Editor: Network pane, you can set PHY Model and MAC Model. This example retains their default values.
In the Network Browser pane, select AP1. In the Property Editor: Node pane for AP1, in the Node Configuration section, set Modulation and coding scheme to
2, Number of transmit antennas to2, Number of space-time streams to2, and Transmit power to15.Click Apply.
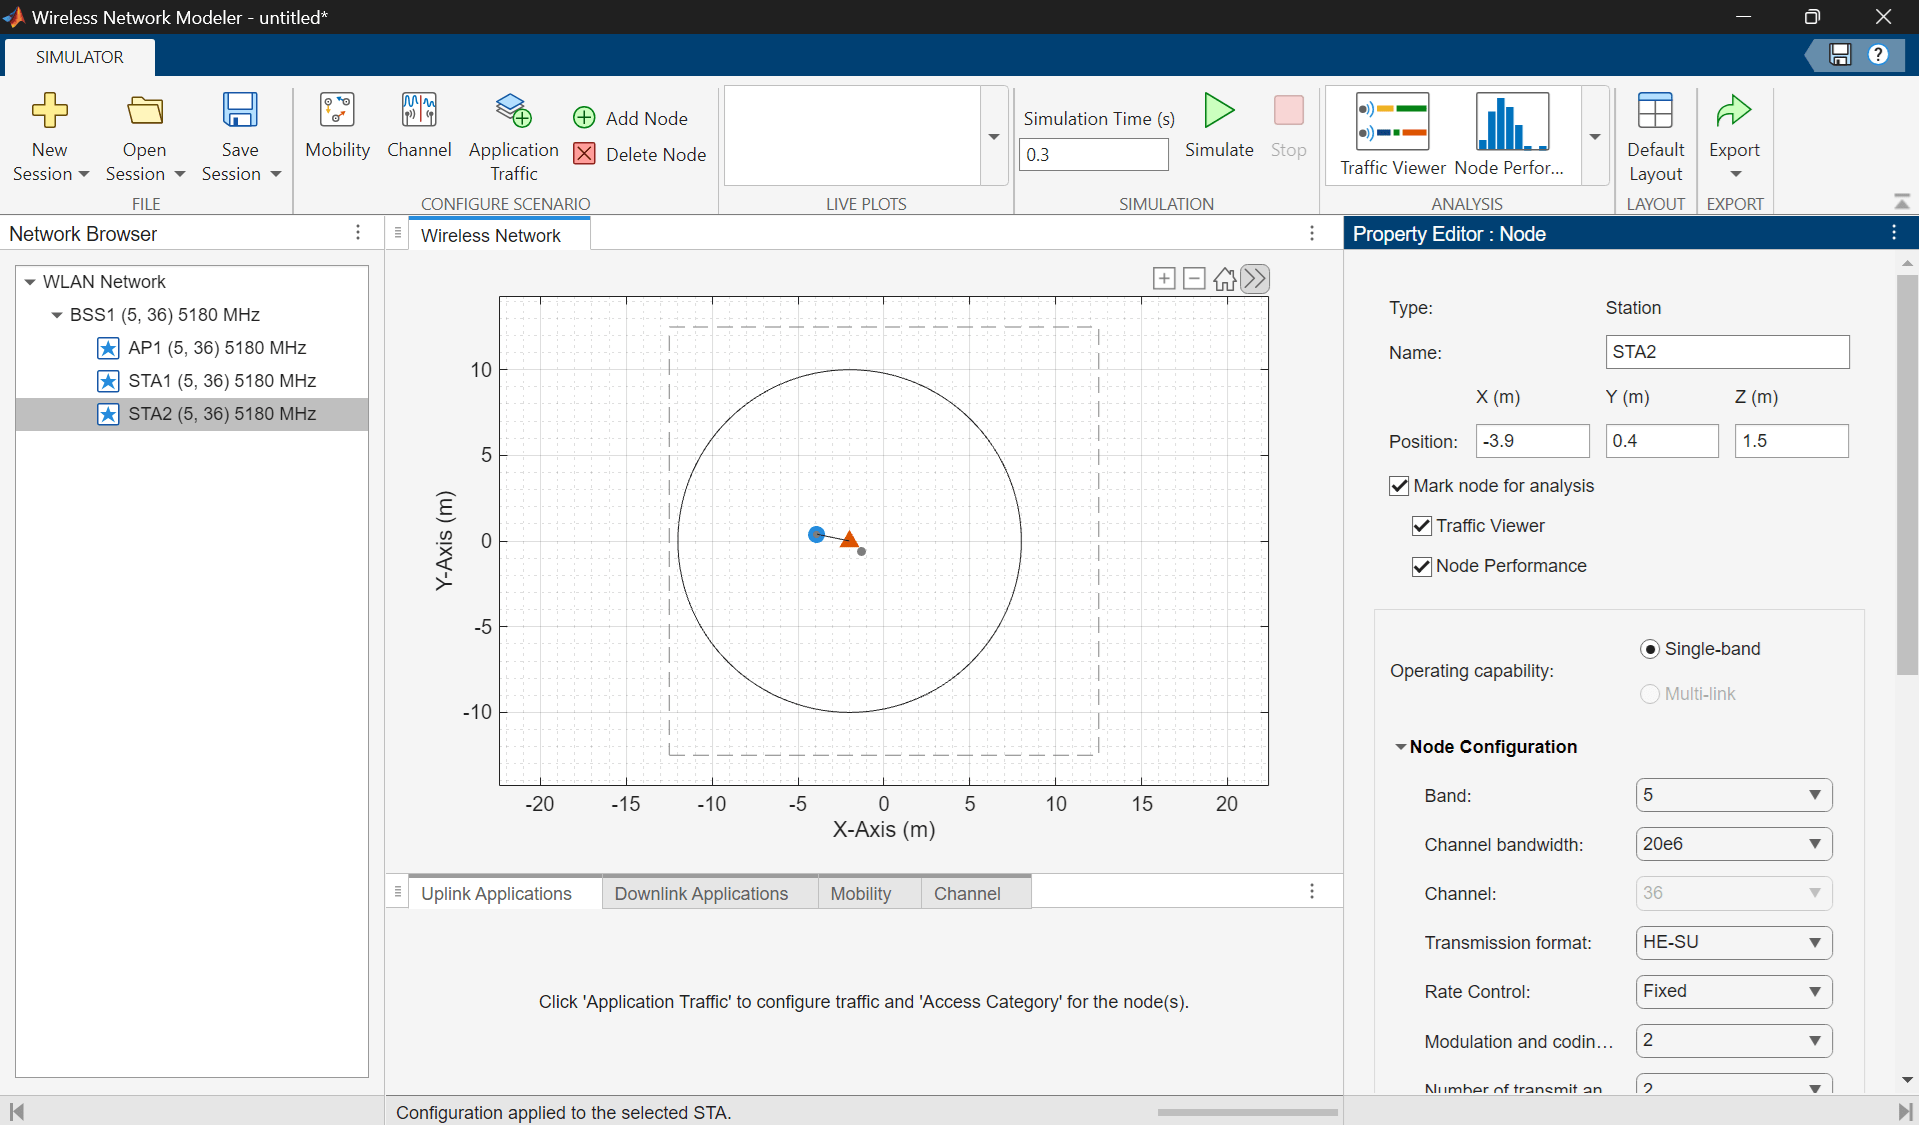
In the Network Browser pane, select STA1. In the Property Editor: Node pane for STA1, in the Node Configuration section, set Modulation and coding scheme to
2, Number of transmit antennas to2, Number of space-time streams to2, and Transmit power to15.Click Apply.
In the Network Browser pane, select STA2 and configure it with the same parameter values as STA1. Then, click Apply.
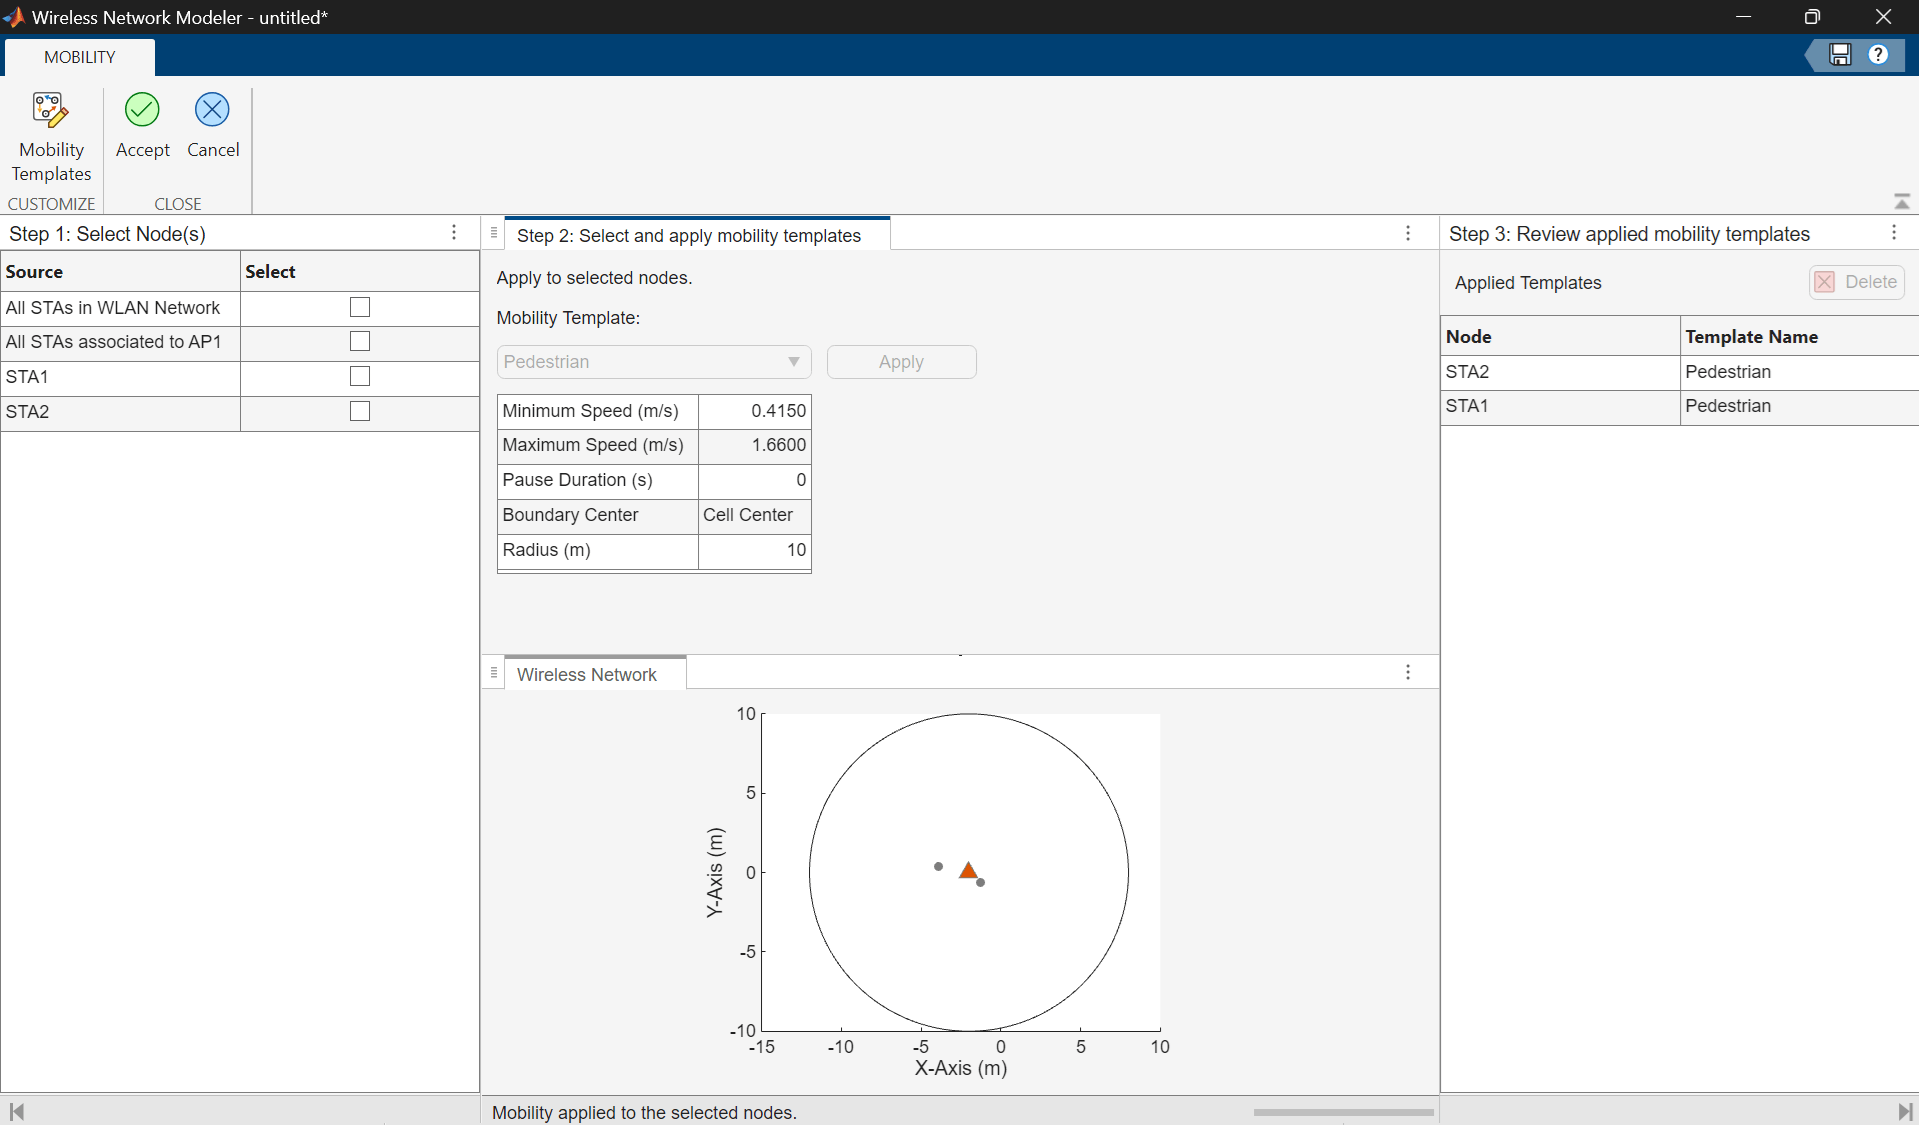
Add Mobility to Station Nodes
Add a mobility model to the station nodes by following these steps.
In the Configure Scenario section of the toolstrip, select Mobility.
In the table in the Select Nodes pane, select All STAs in WLAN Network.
In the Select and apply mobility templates pane, click Apply.
On the toolstrip, click Accept.
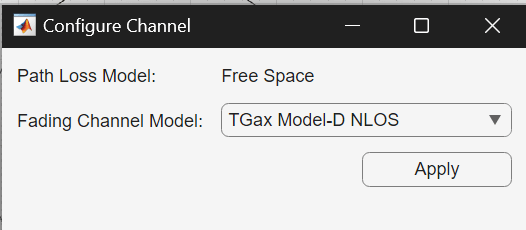
Configure Channel
In the Configure Scenario section of the toolstrip, select Channel. Then, in the Configure Channel dialog box, set Fading Channel Model to TGax Model-D NLOS, and click Apply.
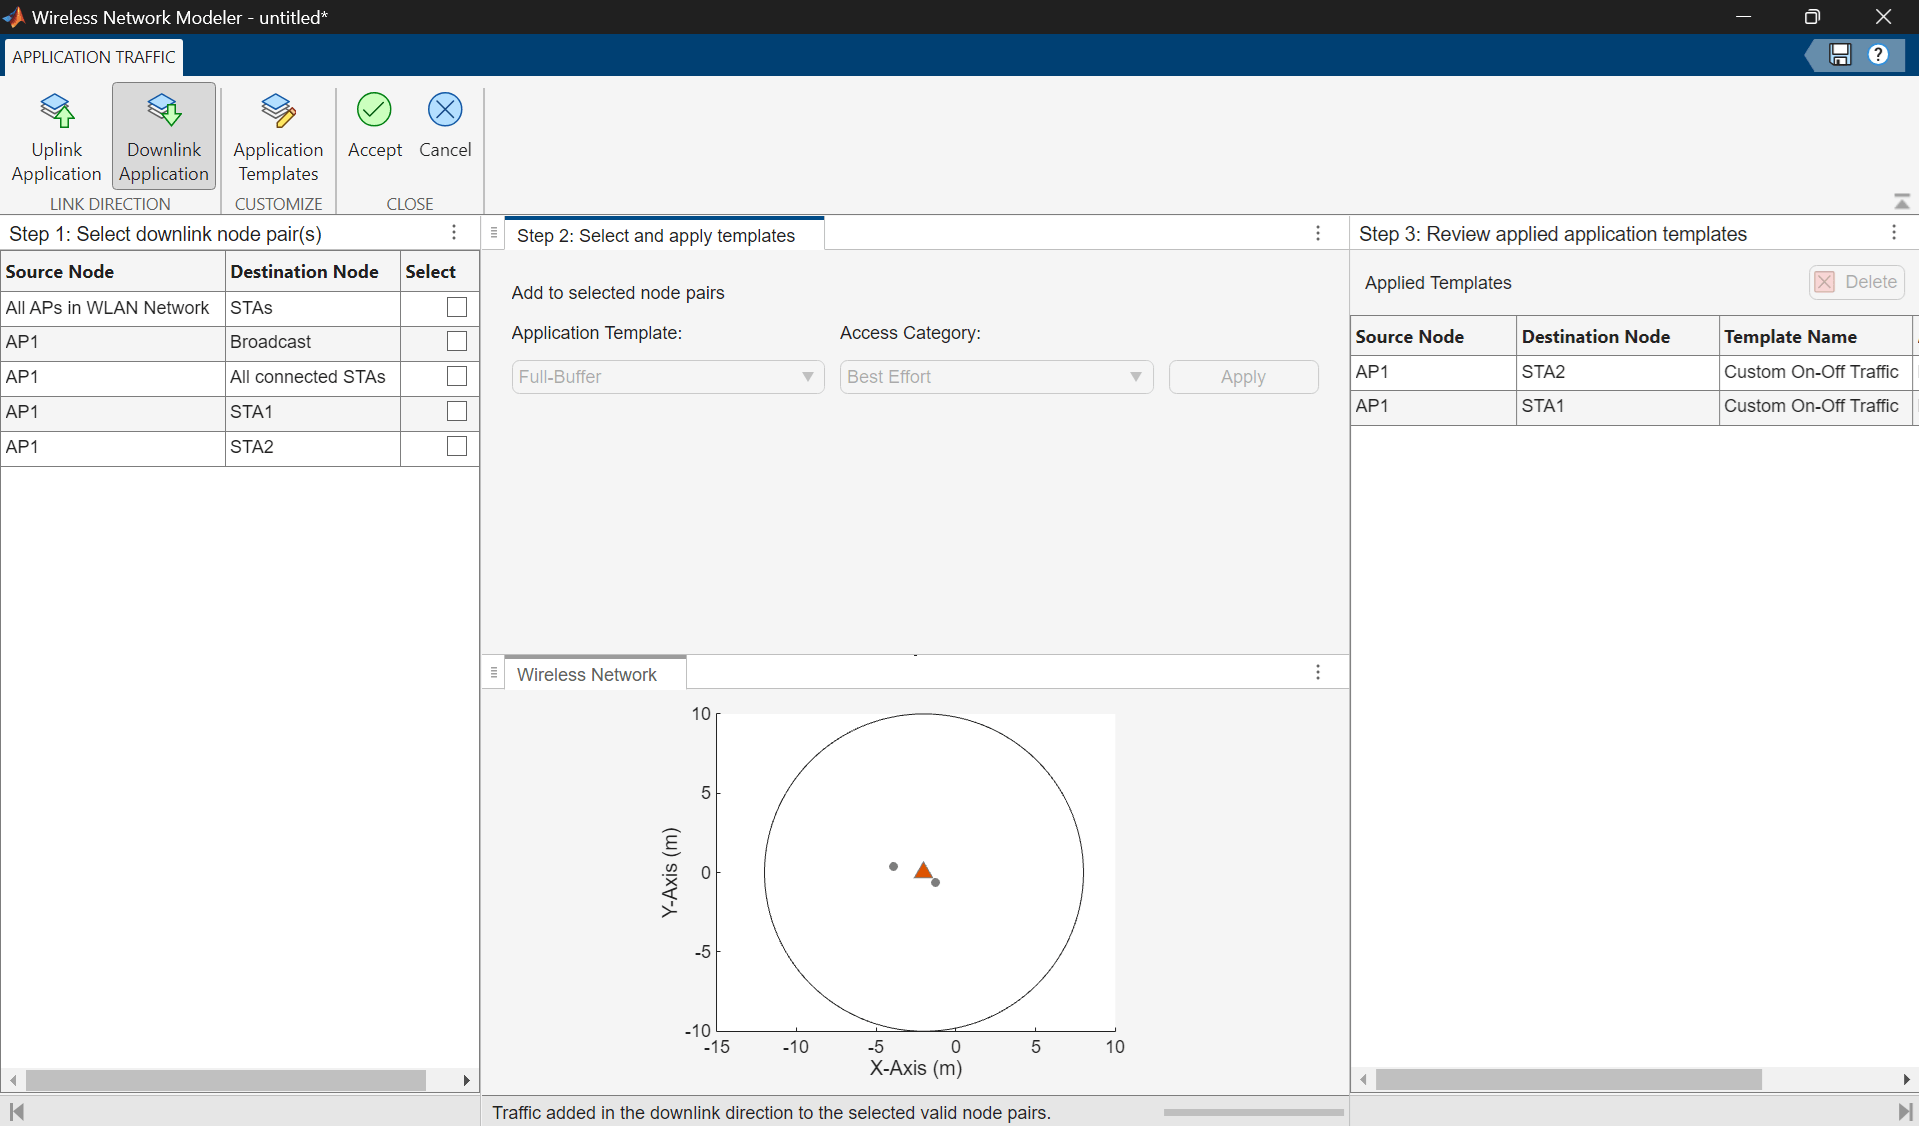
Configure Application Traffic
To configure the application traffic, follow these steps.
Add Application Traffic
In the Configure Scenario section of the toolstrip, select Application Traffic.
In the Customize section of the app toolstrip, click Application Templates.
In the Custom Application Templates dialog box, in the left pane, select On-Off traffic and click to create a copy of the selected application template..
For the custom On-Off template, specify Template Name as
Custom Network On-Off.In the Select uplink node pair(s) pane, select All STAs in the WLAN Network. In the Select and apply templates pane, set Application Template to
Custom Network On-Offand Access Category toBest Effort, and click Apply.In the Select downlink node pair(s) pane, select All APs in the WLAN Network. In the Select and apply templates pane, set Application Template to
Custom Network On-Offand Access Category toBest Effort, and click Apply.On the toolstrip, click Accept.
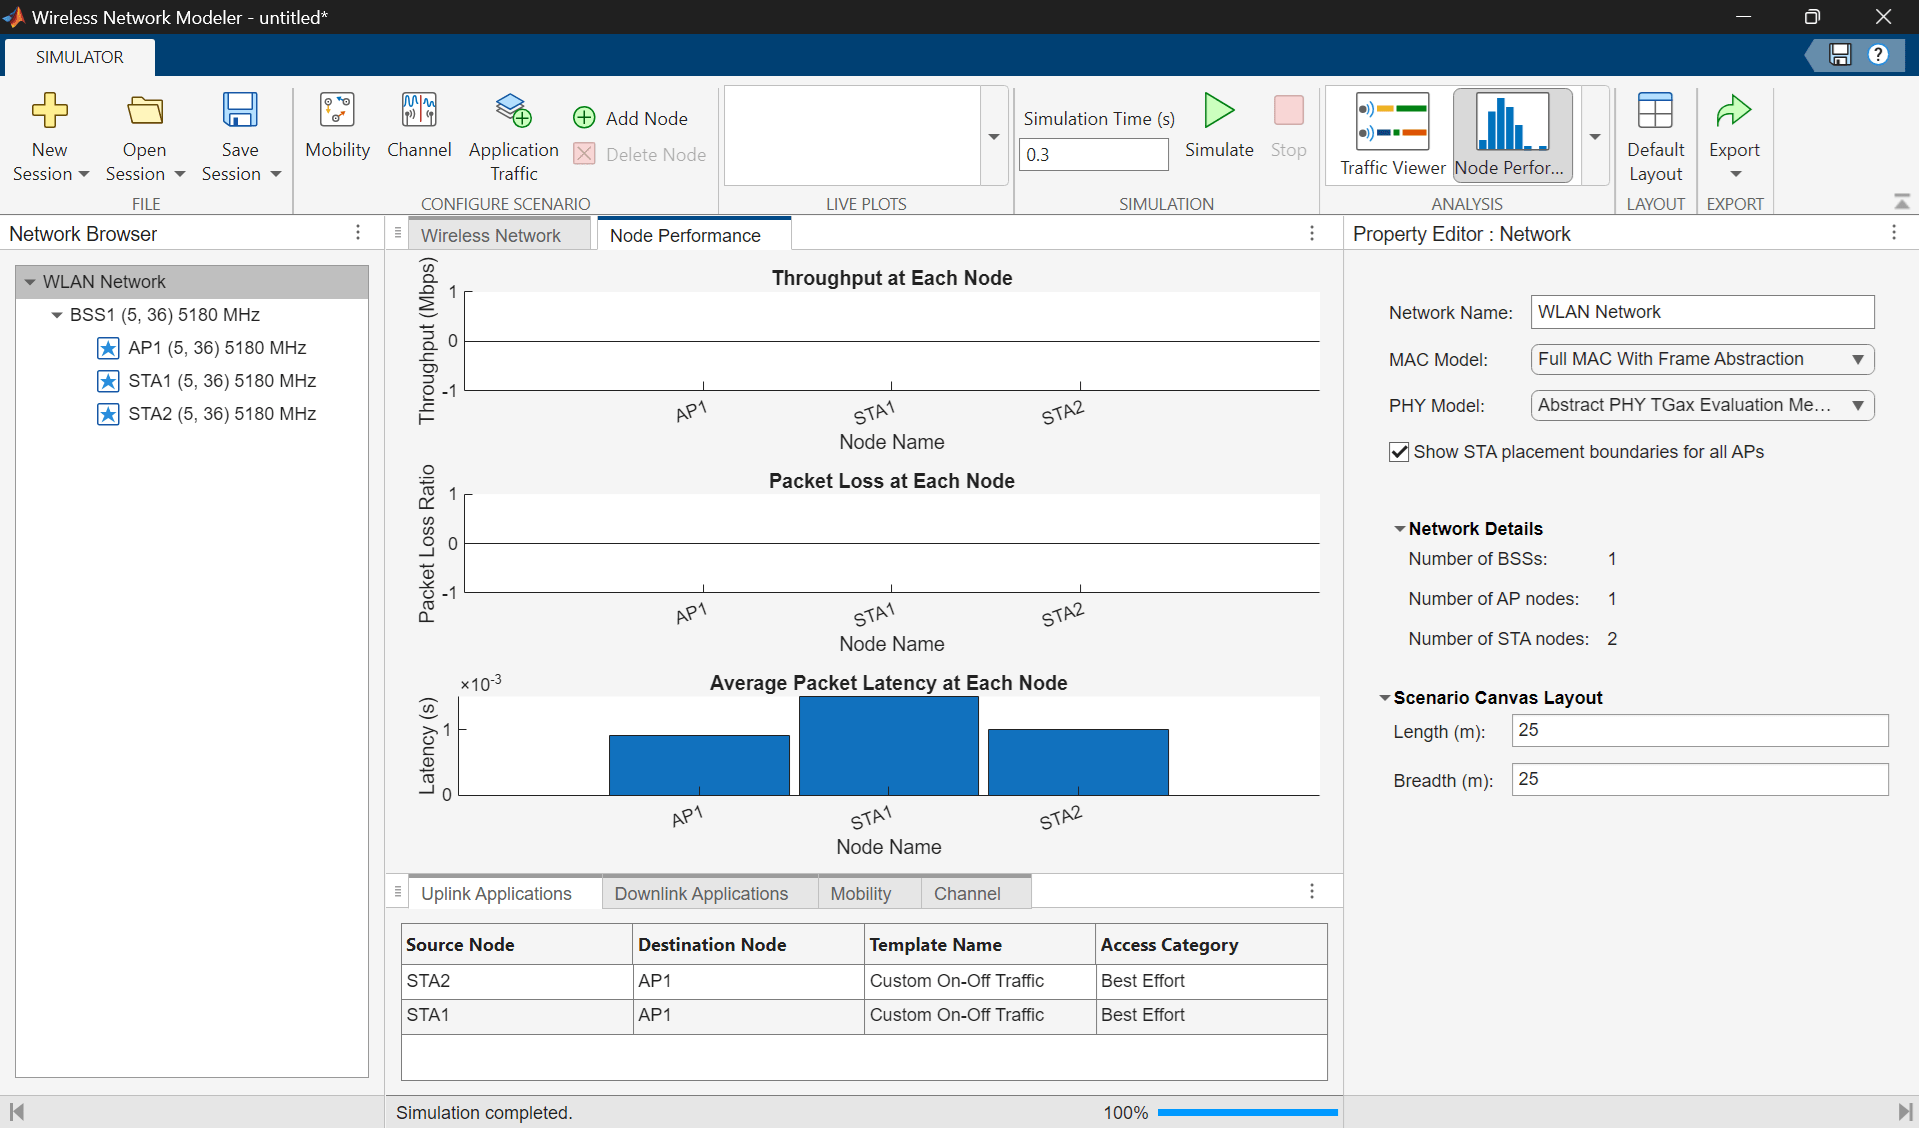
Simulate and Analyze Network Performance
On the app toolstrip, click Simulate in the Simulation section. To analyze the throughput, latency, and packet loss of the nodes, click Node Performance in the Analysis section. You can monitor progress using the status bar at the bottom of the window. This displays the Node Performance pane.
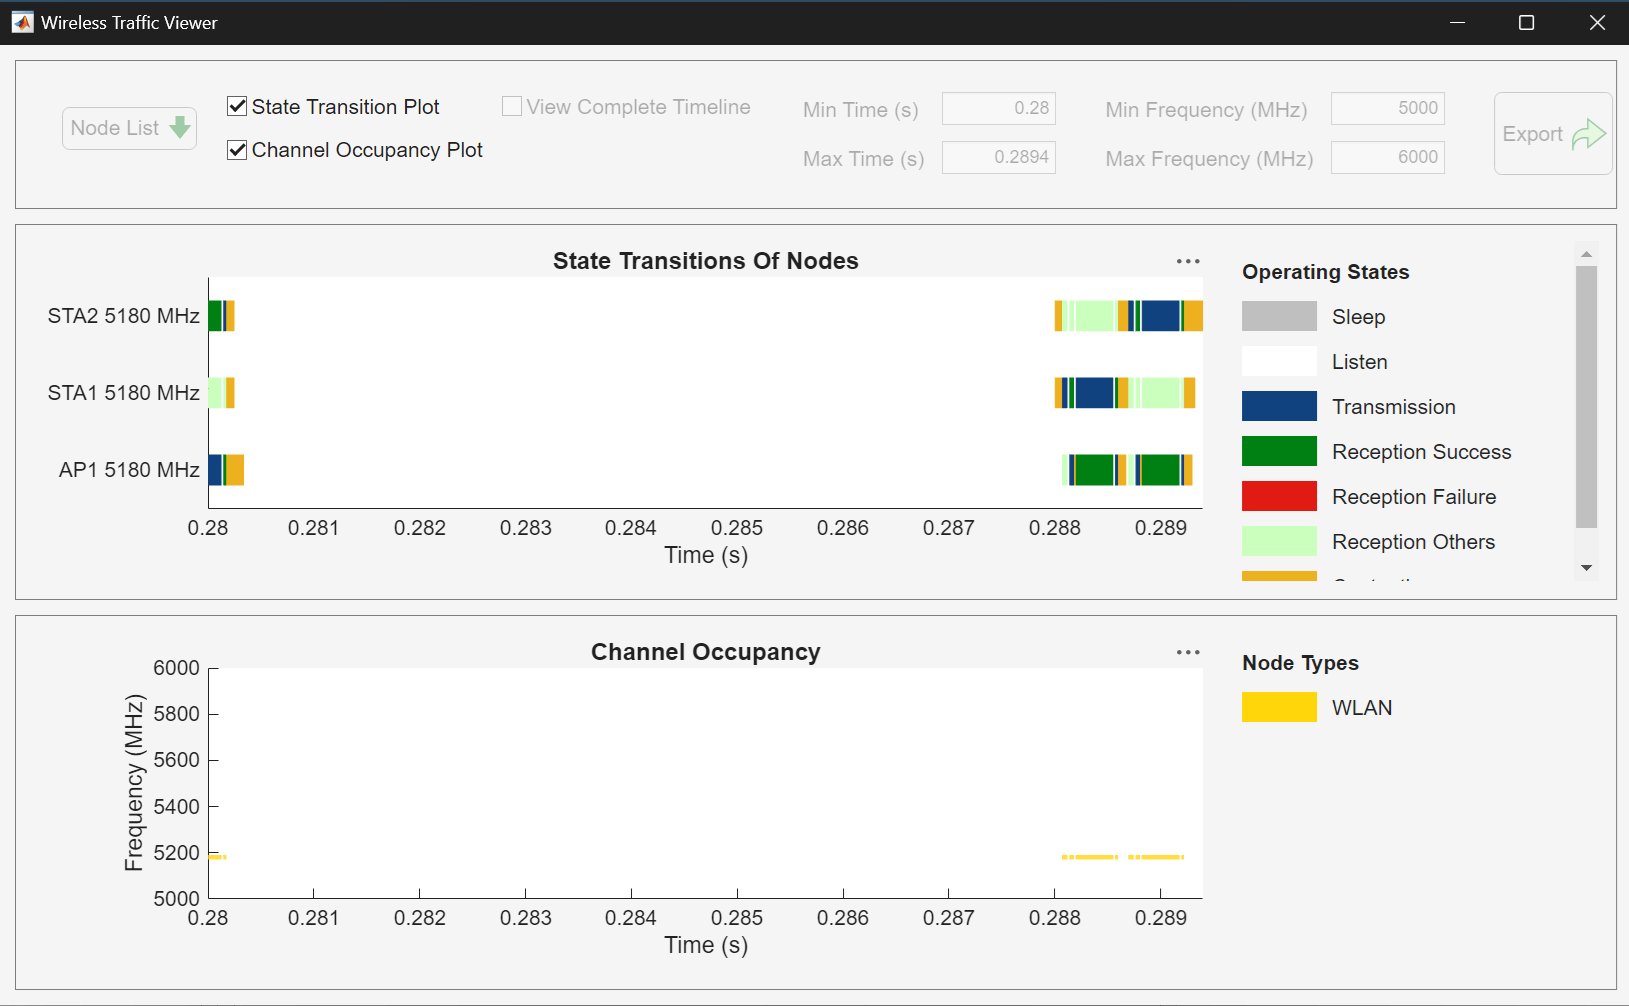
To view the state transitions and channel occupancy of the WLAN nodes, click Traffic Viewer in the Analysis section. The Wireless Traffic Viewer window provides a visual summary of how each node transitions between the contend, transmit, receive, listen, and sleep states.
Further Exploration
Try exporting the MATLAB code or, alternatively, export results, logs, and visualizations for your WLAN network scenario by clicking Export on the toolstrip and selecting either Export MATLAB script or Export Results and Logs. You can also save the session to a MAT file and load it back to continue in a later session.