Get Started with Transfer Learning
This example shows how to use Deep Network Designer to prepare a network for transfer learning.
Transfer learning is commonly used in deep learning applications. You can take a pretrained network and use it as a starting point to learn a new task. Fine-tuning a network with transfer learning is usually much faster and easier than training a network with randomly initialized weights from scratch. You can quickly transfer learned features to a new task using a smaller number of training images.
![]()
Load Image Data
In the workspace, extract the MathWorks® Merch data set. To access this data, open the example as a live script. This small data set contains 75 images of MathWorks merchandise, which belong to five different classes (cap, cube, playing cards, screwdriver, and torch).
folderName = "MerchData";
unzip("MerchData.zip",folderName);
Create an image datastore. An image datastore enables you to store large collections of image data, including data that does not fit in memory, and efficiently read batches of images during training of a neural network. Specify the folder with the extracted images and indicate that the subfolder names correspond to the image labels.
imds = imageDatastore(folderName, ...
    IncludeSubfolders=true, ...
    LabelSource="foldernames");
Display some sample images.
numImages = numel(imds.Labels);
idx = randperm(numImages,16);
I = imtile(imds,Frames=idx);
figure
imshow(I)
![]()
Extract the class names and the number of classes.
classNames = categories(imds.Labels);
numClasses = numel(classNames);
Partition the data into training, validation, and testing data sets. Use 70% of the images for training, 15% for validation, and 15% for testing. The splitEachLabel function splits the image datastore into three new datastores.
[imdsTrain,imdsValidation,imdsTest] = splitEachLabel(imds,0.7,0.15,0.15,"randomized");Load Pretrained Network
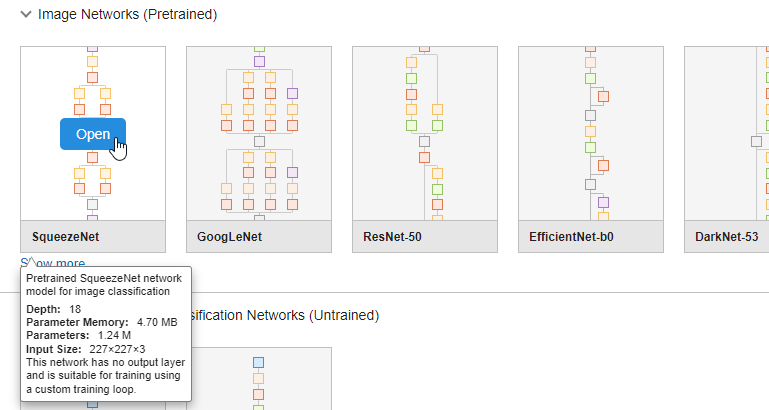
To adapt a pretrained neural network for a new task, use the Deep Network Designer app.
deepNetworkDesigner
Select SqueezeNet from the list of pretrained networks and click Open.
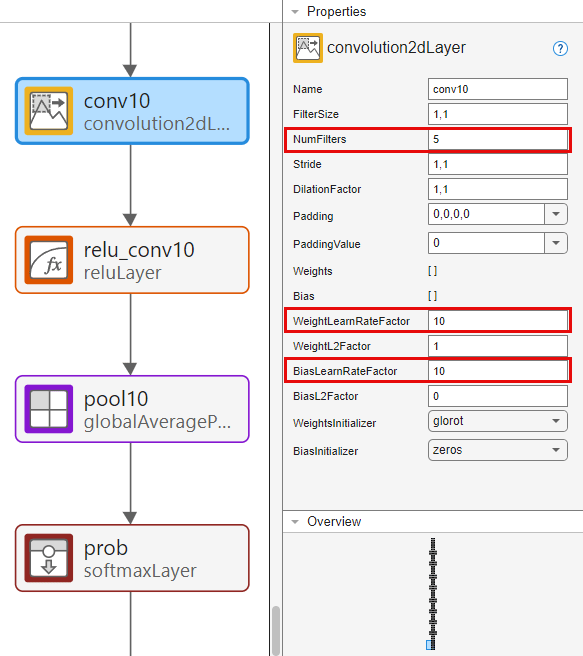
To edit the network for transfer learning:
Set the Number of classes to the new number of classes — in this example,
5.Set the Learning rate in the last learnable layer to
10so that learning is faster in the last learnable layer than in the transferred layers.Click Import.
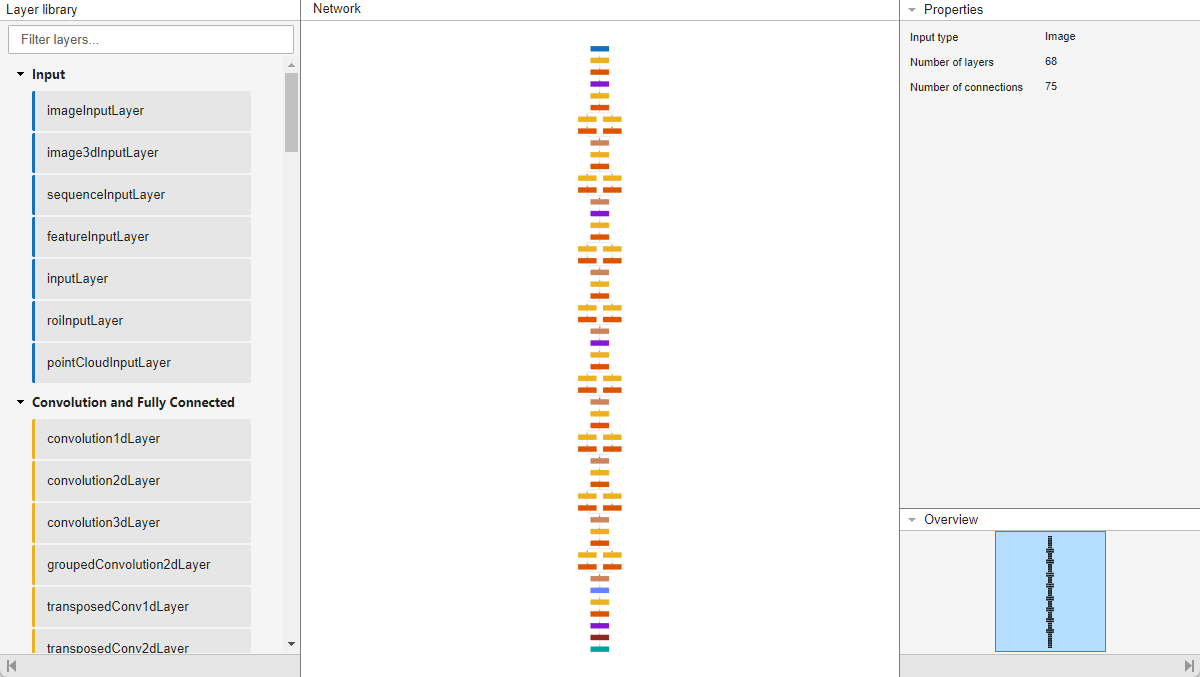
Deep Network Designer displays a zoomed-out view of the whole network.
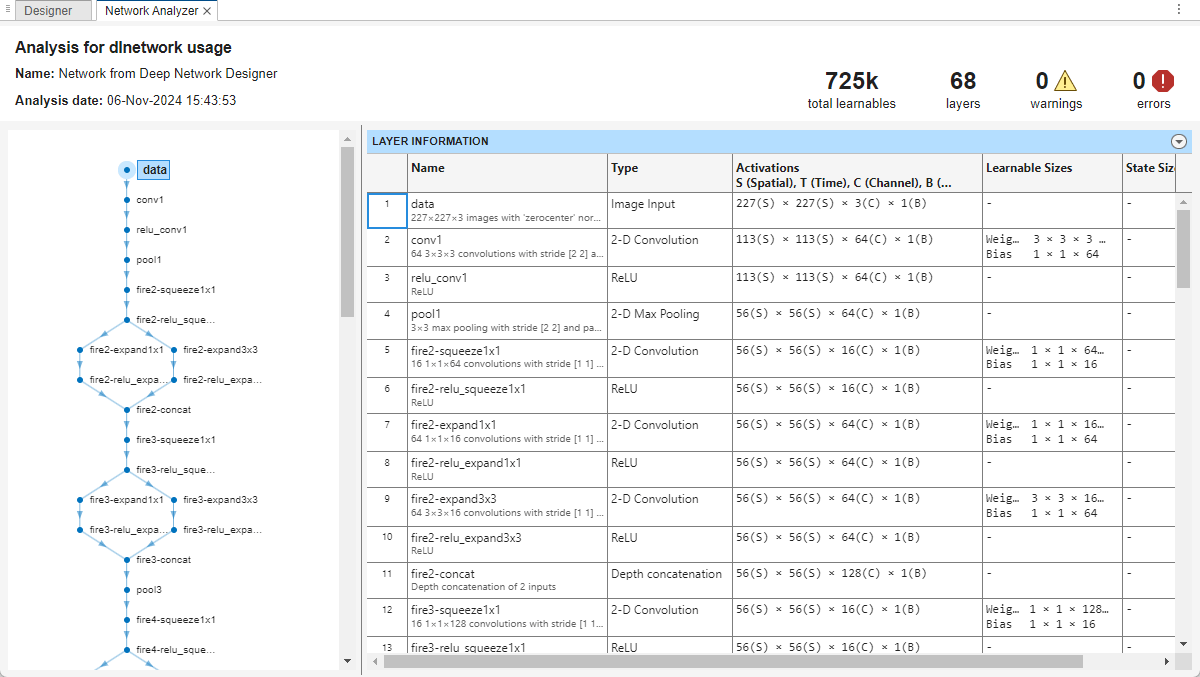
To check that the network is ready for training, click Analyze. The Deep Learning Network Analyzer reports zero errors or warnings, so the network is ready for training.
To export the network, click Export and then click OK. The app saves the network in the variable net_1.
Specify Training Options
Specify the training options. Choosing among the options requires empirical analysis. To explore different training option configurations by running experiments, you can use the Experiment Manager app.
options = trainingOptions("adam", ...
    ValidationData=imdsValidation, ...
    ValidationFrequency=5, ...
    Plots="training-progress", ...
    Metrics="accuracy", ...
    Verbose=false);
Train Neural Network
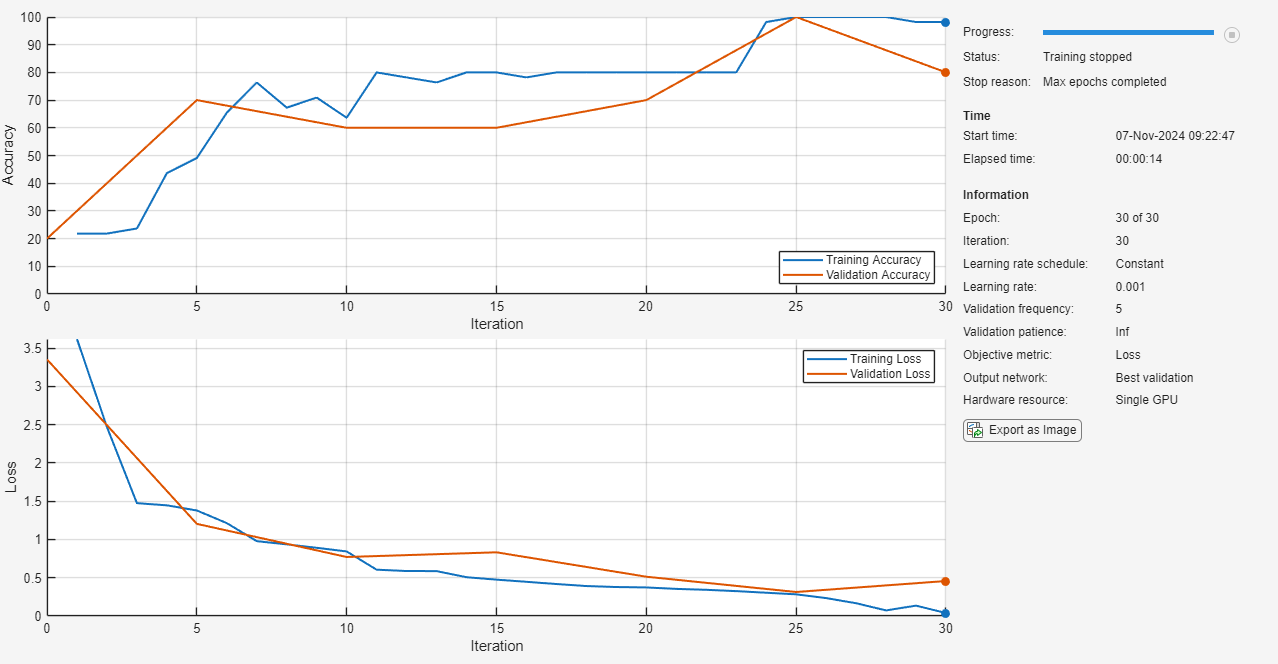
Train the neural network using the trainnet function. Because the aim is classification, use cross-entropy loss.
net = trainnet(imdsTrain,net_1,"crossentropy",options);![]()
Test Neural Network
Classify the test images. To make predictions with multiple observations, use the minibatchpredict function. To convert the prediction scores to labels, use the scores2label function. The minibatchpredict function automatically uses a GPU if one is available.
inputSize = net.Layers(1).InputSize(1:2);

YTest = minibatchpredict(net,imdsTest);
YTest = scores2label(YTest,classNames);
Visualize the classification accuracy in a confusion chart.
TTest = imdsTest.Labels;
figure
confusionchart(TTest,YTest);
![]()
Classify New Image
Classify a test image. Read an image from a JPEG file, resize it, and convert to the single data type.
im = imread("MerchDataTest.jpg");

im = imresize(im,inputSize(1:2));
X = single(im);
Classify the image. To make a prediction with a single observation, use the predict function.
scores = predict(net,X);
[label,score] = scores2label(scores,classNames);
Display the image with the predicted label and the corresponding score.
figure
imshow(im)
title(string(label) + " (Score: " + gather(score) + ")")
![]()
To learn more about transfer learning and how to improve the performance of the network, see Retrain Neural Network to Classify New Images.
References
[1] ImageNet. http://www.image-net.org.
[2] Iandola, Forrest N., Song Han, Matthew W. Moskewicz, Khalid Ashraf, William J. Dally, and Kurt Keutzer. "SqueezeNet: AlexNet-level accuracy with 50x fewer parameters and <0.5 MB model size." Preprint, submitted November 4, 2016. https://arxiv.org/abs/1602.07360.
[3] Iandola, Forrest N. "SqueezeNet." https://github.com/forresti/SqueezeNet.
See Also
imagePretrainedNetwork | dlnetwork | trainingOptions | trainnet | Deep Network
Designer