Install Support Package for Customizing Scenes
To customize scenes in your installation of the Unreal® Editor and simulate within these scenes in Simulink®, you must first install the Automated Driving Toolbox Interface for Unreal Engine Projects.
Note
These installation instructions apply to R2026a. If you are using a previous release, see the documentation for Other Releases.
Verify Software and Hardware Requirements
Before installing the support package, make sure that your environment meets the minimum software and hardware requirements described in Unreal Engine Simulation Environment Requirements and Limitations.
Install Support Package
To install the Automated Driving Toolbox™ Interface for Unreal Engine® Projects support package, follow these steps:
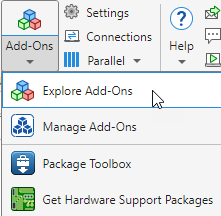
On the MATLAB® Home tab, in the Environment section, select Add-Ons > Get Add-Ons.
In the Add-On Explorer window, search for the Automated Driving Toolbox Interface for Unreal Engine Projects support package. Click Install.
Note
You must have write permission for the installation folder.
Set Up Scene Customization Using Support Package
The Automated Driving Toolbox Interface for Unreal Engine Projects support package includes these components:
AutoVrtlEnv Project
AutoVrtlEnvfolder — An Unreal Engine project folder containing theAutoVrtlEnv.uprojectfile and corresponding supporting files. This project contains editable versions of the prebuilt scenes that you can select from the Scene name parameter of the Simulation 3D Scene Configuration block. You must open the.uprojectfile from Simulink.
Plugins
MathWorkSimulation— A plugin that establishes the connection between Simulink and the Unreal Editor. It is required for co-simulation.MathWorksAutomotiveContent— A plugin that contains the elements of automotive objects that can be modified using Unreal Editor. It is required for co-simulation.RoadRunnerMaterials— A plugin that contains the features of objects and base materials used in roadrunner scenes.
RoadRunner Project
RoadRunnerProject folder — A folder containing prebuilt
scenes which you can directly edit using the RoadRunner scene editing software. This folder contains these
subfolders:
Scenes— A folder containing the scene files for all prebuilt scenes.Assets— A folder containing assets used to build the prebuilt scenes.
To set up scene customization, you must copy the
AutoVrtlEnv project and MathWorksSimulation
plugin folder onto your local machine.
After you install and set up the support package, you can begin customizing scenes. If you want to use a project developed using a prior release of the Automated Driving Toolbox Interface for Unreal Engine Projects support package, you must migrate the project to make it compatible with the currently supported Unreal Editor version. See Migrate Projects Developed Using Prior Support Packages. Otherwise, see Customize Scenes Using Simulink and Unreal Editor.
Copy AutoVrtlEnv Project, MathWorksSimulation and MathWorksAutomotiveContent Plugins to Local Folder
To copy all the support package components to a folder on your local machine and
configure your environment so that you can customize scenes, use the copyExampleSim3dProject function. For example, this code copies the
project files to
C:\project.
localFolder = "C:\project"
sim3d.utils.copyExampleSim3dProject(localFolder);copyExampleSim3dProject copies the plugin files to the
default UE install location, c:\Program Files\Epic
Games\UE_5.x\Plugins\Marketplace\Mathworks. Ensure that MATLAB has write access to the UE install location or run MATLAB in
administrator mode.If you install Unreal Engine at a different location, specify the install path using the PluginDestination name-value argument.
(Optional) Copy RoadRunnerProject Project Folder to Local Folder
To edit the prebuilt scenes directly using RoadRunner, copy the RoadRunnerProject project onto your local
machine.
Specify the path to the support package folder that contains the projects. Also specify a local folder destination to copy the projects. This code uses the support package path and local folder path from previous section.
rrProjectSupportPackageFolder = fullfile( ...
    matlabshared.supportpkg.getSupportPackageRoot, ...
    "toolbox","shared","sim3dprojects","spkg","roadrunner", ...
    "RoadRunnerProject");
rrProjectLocalFolder = fullfile(localFolder,"roadrunner/RoadRunnerProject");
Copy the
RoadRunnerProjectproject from the support package folder to the local destination folder.if ~exist(rrProjectLocalFolder,"dir") copyfile(rrProjectSupportPackageFolder,rrProjectLocalFolder); end
All the prebuilt scenes and the assets are now located in the specified local folder.
Configure Environment on Linux Platforms
To configure your environment so that you can customize scenes on Linux® platforms:
Install the Unreal Editor in the root directory with this folder structure:
/UnrealEngine/UnrealEngine-5.4/UnrealEngine/Engine/...Use
copyExampleSim3dProjectto copy the support package components and specify thePluginDestinationas/UnrealEngine/UnrealEngine-5.4/UnrealEngine/Engine/Plugins/Marketplace/Mathworks.Set the Unreal Editor as the default application for
.uprojectfile.For example, navigate to
AutoVrtlEnv.uproject.Right-click the
AutoVrtlEnv.uprojectfile, select Open With, and then select Open With Other Application.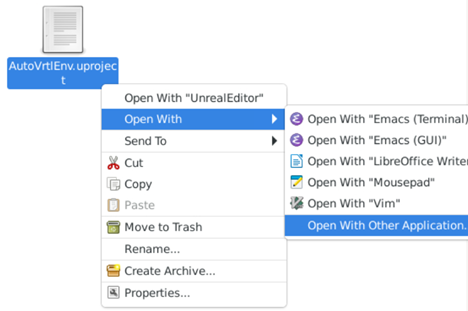
Click Browse and select the Unreal Editor application in
/UnrealEngine/UnrealEngine-5.4/UnrealEngine/Engine/Binaries/Linux/UnrealEditor. In the Open With dialog box, selectUse as default for this kind of file.